PUTV, I think Revopoint must have shipped you a POP3
1 Like
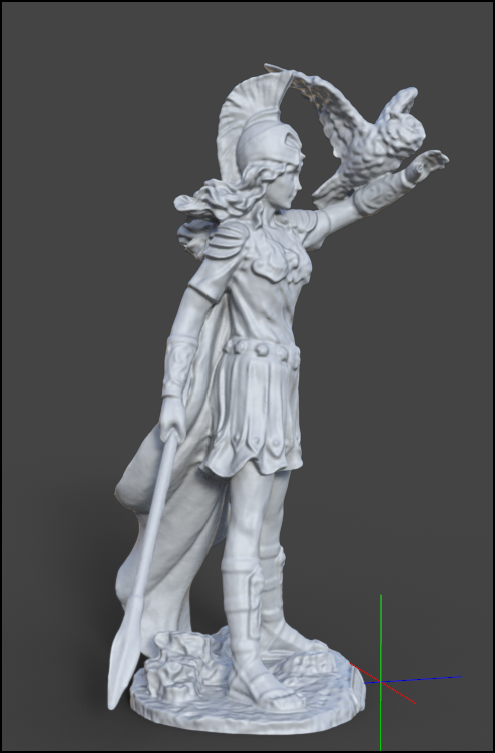
The red marks are ok as long it is solid , the Athena figurine is made from some kind of marble jade, it is not polishing smooth it actually absorbing the Infrared light and do not reflect it , that why no red , by the feet the angle changed that maybe why it reflect some of the IR back to the Depth Camera .
I did not used any spray , the spray actually reflect a lot and make it more red .
When you saw my Chinese Lion it was all red , but that is OK as long it is solid red without breaks of white pixels inside .
Jeff I tested with so many lights inside my Light Box , nothing affecting it ,only remote control and direct sunlight .Some surfaces are more reflective than other , my Athena is very porous, zero reflectivity . But the other Chinese Lions was reflecting like crazy , I had to go away with POP2 on the edge of excellent but as I said already , red is not bad as long there is no white surface appearing inside the red area .
This is the first time I scanned something that is almost no red at all , spray make it more red since it purpose is to reflect the IR back to camera . Moving it a little away helps to balance the exposure .
LED do not affect IR since it do not emitting IR, not any bulbs I have at home . Think about POP2;s Depth Camera as a night vision , how closer the objects how brighter they appears, the gain function increased the level of IR that POP2 is emitting.
1 Like
@nick-mesh Thanks so much ! I am using the powder on the living , but with airbrush , however it needs a lot more than quart of teespon to make the mixture . Zinc Oxide naturally reflect Infrared Light and UVs , that why it is used in sun screen , the best so far and very economic .
Looking forward to your successful story when you are back !
Thanks for the support !
@Miamijerry , I wish that was true , but if they did you would see blue light ![]() of MINI , since there is no POP3 lol
of MINI , since there is no POP3 lol
When I speed up the video a little bit to save on time I saw how many shaking I made , crazy , at the end the camera arm was little too lose going everywhere lol but did not lost tracking for one sec , what is insane . I guess I had a perfect surface combination and volume with so unique features around the figurine . I told you before , how more unique features of the object how less issues with scanning and tracking .
I did this crazy session because someone said they want to have the ability to scan everything inside Revo Studio without leaving anywhere , so here we go … it worked beyond my own expectation, if I did not recorded it I would not believe it .
For those that uses POP2 for creating assets
I remeshed the original 2 millions poly scan data to 6K only for use as asset in 3D rendering
This is the low base 6K poly model remeshed from my original Athena Sculpture I scanned the other day

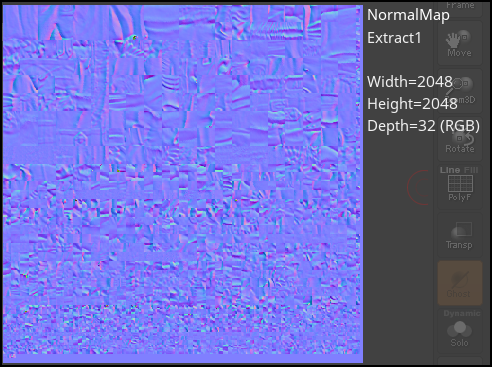
Then extracted all the details from the original mesh into Displacement and Normal maps
fully optimising all the UVs space .
Normal maps
Displacement Maps

And here is the result after rendering of the
**6K model with the extracted details **

No maps low poly model vs rendered the same model but with maps

Game ready !
Anybody that is into game and rendering assets interested in a workflow tutorial about it in Zbrush, let me know .
9 Likes
Scan of today
Athena Bust 13 inches
I tried to scan it on my Android Phone , but because of having only 6GB RAM, I run quickly out of memories , so not possible to scan it in one run , I would need at least 2000 frames . Fusing and continuing scanning was painful to keep up with the tracking … not to mention the time wasted for fusing 1300 frames . I meshed it back on my PC in Revo Studio .
I used Face mode and High Accuracy via WiFi , powering it down with my phone via USB-C .

Here rendered afterwards in 3D software with SSS


And Clay version shader


Sadly the bust did not fit inside my 16inches Light Box so have to scan it on the table
I have to say , scanning with the phone and the limited frames is very stressful , you don’t know where to focus, on the scan or the frames , it gives you anxiety ![]()
Next time I will try on my tablet that have 2 OS , Android and Windows , so not need to watch the frames anymore . I think the best solution would be saving the point cloud to the cache on your internal memory HD and finish the fusing job on the computer , I can’t imagine walking with my phone outdoors scanning stuff , the light outdoors change too fast , 20 min time between scanning is bad if you want color data … I hope the programmers add the cache function soon.
However I like how Android app fusing the point cloud data, still so much better than PC app .
3 Likes
I am curious how you produce the maps of normals & depth and align them to get these results.
2 Likes
I made some turntable speed tests , the winner was 60 sec rotation per 360 degree , less noises, more fine details , but need double frames per rotations means longer scanning time and processing .
Also made totally different tests scanning the model with just 12 frames , I turn the turntable each 30 degrees and stop, start scanning until Revo Scan’s tracking turn green and aligned then click stop , turn again 30 degree until I was finished by 11 , it worked amazing however little time consuming . It gonna be great for bigger scans , this way I can save on frames on my smartphone too and the POP2 button gonna be very handy doing it . The test was done using Feature mode . Face or Body mode may need maybe 9 positions for full scan . This is more like taking 3D picture in place of scanning , next time I will try to make just 12 frames separately and merge them all in Revo Studio or CC to save time .
The skull medical replica was only 4 inches , but it has accurate details inside and out that POP2 picked up so well . Just recorded the process of regular scanning all the fragments , in process of editing the video now , will upload shortly
**10 sec , 2 times faster than the original , you can see the ridge of the Infrared pattern on the model **

** 20 second , 10 sec faster than the original turntable , The object has slightly more noises but still acceptable , good for simple objects**

60 second per rotation , 2 times slower than original Revo turntable , smoother surface , more fine details on the surface .
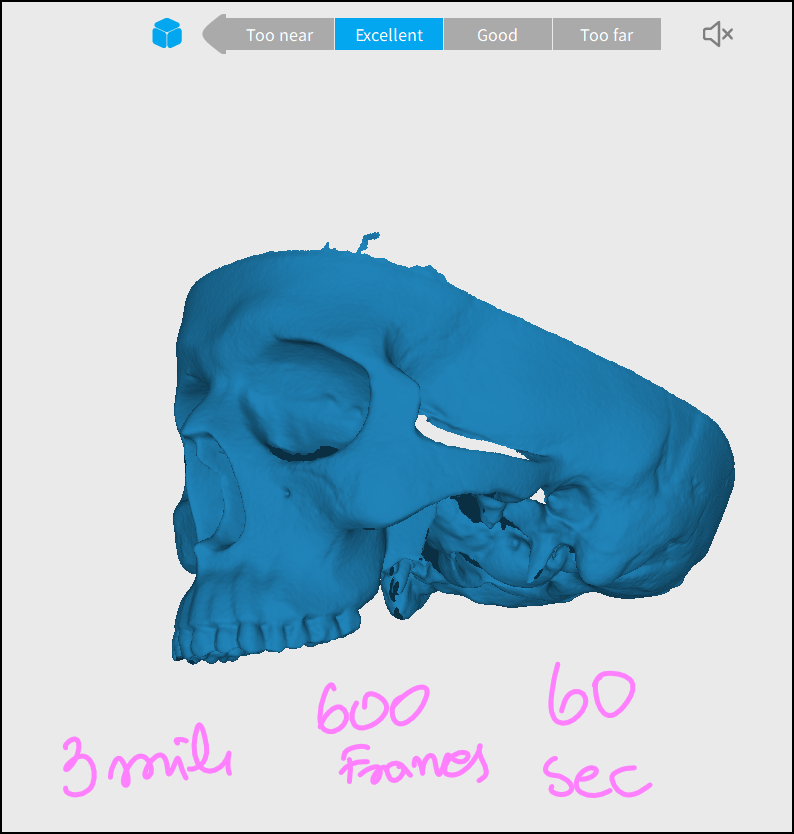
It was a great challenge that take me over 2 hours of scanning and merging in CC to accomplish , sadly Revo Studio was only good for the jaw bones , the rest was impossible to merge correctly without CC . The skull was from 3 parts and needed at least 8 scans , the base part was too complicated with all the details inside and out . I have to use feature mode and marker modes as well .


It gonna be great addition to my medical illustration work .
I am still speechless that POP2 captured so much details, just from 4 inches replica , did not expected that .
7 Likes
I am tired of purchasing markers and decided to make reusable one using fine magnets
great for metal parts and can be attached everywhere , I am for plan to make a new scanning plate but from painted black metal so I can re-arrange the markers where I want for different objects , small or big
The magnets I got are here , very fragile but powerful 10mm/1mm
and the reflective markers I am using to go with the magnets 10mm outside diameter and 6mm inside
Nothing ground breaking here about but it , but you never know when you need it


you can just put them on your bigger turntable without the need to stick it to the surface , heavy enough to stay in place .
Finally I can use the markers on top of my silicone mat without wasting them each time

8 Likes


Nice idea, to make them easier to put on / take off, and re-usable!
I’m wondering if POP2 assumes the top surface of the marker is flat on the surface of the object being scanned (when building the point cloud), or if it just ignores it as a blind-spot, and markers are used exclusively for positioning only…
…i.e. does being 1mm ‘above’ the surface introduce some inaccuracy in the point cloud. Of course, when on the the turntable - no problem as we’re don’t care about the scanning for that.
I was thinking about using micro-suction tape (re-usable / cleanable / adhesive), to do something similar for larger non-ferrous objects, but I’m not sure if the thickens of the tape would cause inaccuracy… (or make some bumps where markers are)
Btw - hats off to you, PUTV - this forum thread and your videos are nothing short of awesome : )
2 Likes
The surface is never flat even if you just stick the paper marker on the surface , the problem is the black color, or it get bump or it get hole , there is always something , for fine work I would never need markers , and people that scan objects for reversing engineering , they do not cares about details , this is what it is for . And of course on turntable you do not see anything after anyway . And that is my primary application I love using my silicone mat , it give some stability to the objects reducing shaking so it works great now , I can rearrange it they way I want or take off in seconds .
Anything you stick on the surface will pick up even a simple tape , the edge will be visible so not big difference actually .
The markers are only used for visual tracking and nothing else , example you want to scan a sphere , markers not need to be on the sphere , as long it is visible in the Depth Camera preview and picked up by the scanner , so not really measuring or anything , it is more for the stabilization in tracking , like in photogrammetry when the object is in the middle and the surrounding is just moving , so the software can recognize the object in 3D space , however it scans blindly based only on the surrounding ( red dots markers) and not the object’s features, typical photogrammetry style.
Other 3D scanners uses markers for measuring the object in space ( volume) before they are rescanned providing high accuracy , but POP2 don’t use this technology .
For POP2 there are other ways how to attach the markers for scanning beside the object or the turntable plate , as long it is moving around that’s. all what counts
and thanks @higrant , I am a little burned at this moment , lots of stuff is going on and work , once I have more time I will post some new stuff , I have 1 and half hour video to edit scanning the skull and merge in CC what was as difficult as scanning an engine, because each part was volumetric inside and out , one of the most difficult scans I made with POP2 so far .
anyway thanks for stopping by ! ![]()
2 Likes
Got it, so the marker is for positioning only, and in effect creates a ‘hole’ in the point cloud, which would get filled based on the real-stuff around the edges of the marker… noting however that any thickness / material under the marker actually creates a scanable surface edge… which in-turn would create a bump : )
Most of my scenarios are larger handheld scans, with less features (easy to lose tracking) - I’m needing to place 50+ markers, then try and remove them with my fingernail. In my case, I’m able to position the marker in a spot that’s close, but not on top of the scanning area that I care about… so, bottom line… thicker, easily removable / re-usable markers, are going to be a lifer-saver!
Thank you for your wisdom and explaining how POP2 works ![]()
Hope the work pressures ease up soon, so you can focus on the fun stuff ![]()
3 Likes
@higrant that is correct , I did not tested yet the new magnet markers on the object to see the difference of the surface , however when POP2 scanning dark material like black letters etc… it creates slightly bump , the edges of the magnets are metal so it may be not even be visible , and closing holes while meshing may fix it .
Removing the sticky markers is painful especially the new reflective one , I will make some quick tests in the weekend to see how it works on the surface . Like for example scanning fragment of my fridge with the magnet markers on lol , plus I have a new idea for placement of the markers that don’t need turntable plate or the object , we will see it in action soon.
Thanks again !
1 Like
I like that idea, I’ve got 50 on their way and 480 stickers on their way as well, maybe I could put one on each side of the magnet to kind of reinforce it a bit from breakage too seeing as I’ll have so many? (thinking more dropping them type scenario, and probably use them mostly on the turntable).
Looking forward to seeing how your test with them turns out! Also I haven’t checked your channel yet to see if you posted a vid for it or not, now off to watch your workflow from Pop to Zbrush that you mentioned a few posts up!
Thanks for all the testing and info, this has been a big help and great read!
1 Like
Be careful with them , don’t collect with bigger magnets they will crack down , once you put the marker sticker on , they are much stronger , placing on both sides is a good idea as well .
I did not made test yet , maybe today since I need to make marker mode video anyway , I have only 2 new videos with showcase I uploaded this week to my channel , and the others early .
All pleasure on my side … always fun … thanks a lot Jon
if you have ideas for some new videos let me know .
I checked the “bump” from the metal markers and the stickers , there is really no difference , you can get bump on your surface same from stickers as you can get from the metal , it is not big deal since you can smooth it out in a second .
I attached the magnet markers with another magnet behind on the plastic part , saved 6 markers Yeah! ![]()
you see you get the bumps bigger in one spot and smaller in another , makes no difference
but the stability was great for the tracking .

Now if you use both markers on the front and back magnets you get yourself extra tracking at once from both sides , it came to me after I took the inside photo , it is easier to arrange the pattern just by sliding them in the right position , so simple idea but so effective .
If you close holes in Revo Studio and use flat option then you will have no “bumps”


anyway it works so mission accomplished
2 Likes
Cool cool, I like this magnet idea, the markers I got here in the UK were WAY more expensive than the US Amazon option. The page and reviews also mentioned they were brittle so don’t let them snap together, which made me thing doubling up the markers would mitigate that. On top of I don’t really need to worry about which way they’re facing when not sticking to metal stuff ![]()
Should have them mid-week for some testing! Even if Revo didn’t smooth that bump, that’s an easy fix in Zbrush! I wonder how thick a magnet we could get away with to gain a little more strength, but hopefully the sticker makes a nice difference on both sides.
1 Like
@b0ssk , I made quick scan of a table corner when I was sticking the rest of the markers to my magnets , and nothing , only one bump … I think it depends of the angle you holding POP2 to the surface , if straight from above there are actually no bumps, nah maybe 1 in this case here. but easy to fix

BTW once the markers are on the magnets they stopped cracking when collected , I tested
Now I am thinking about another idea for markers for bigger objects , I mean with big flat areas , other way you need a lot of the small markers , I wonder how RevoScan will handle that .