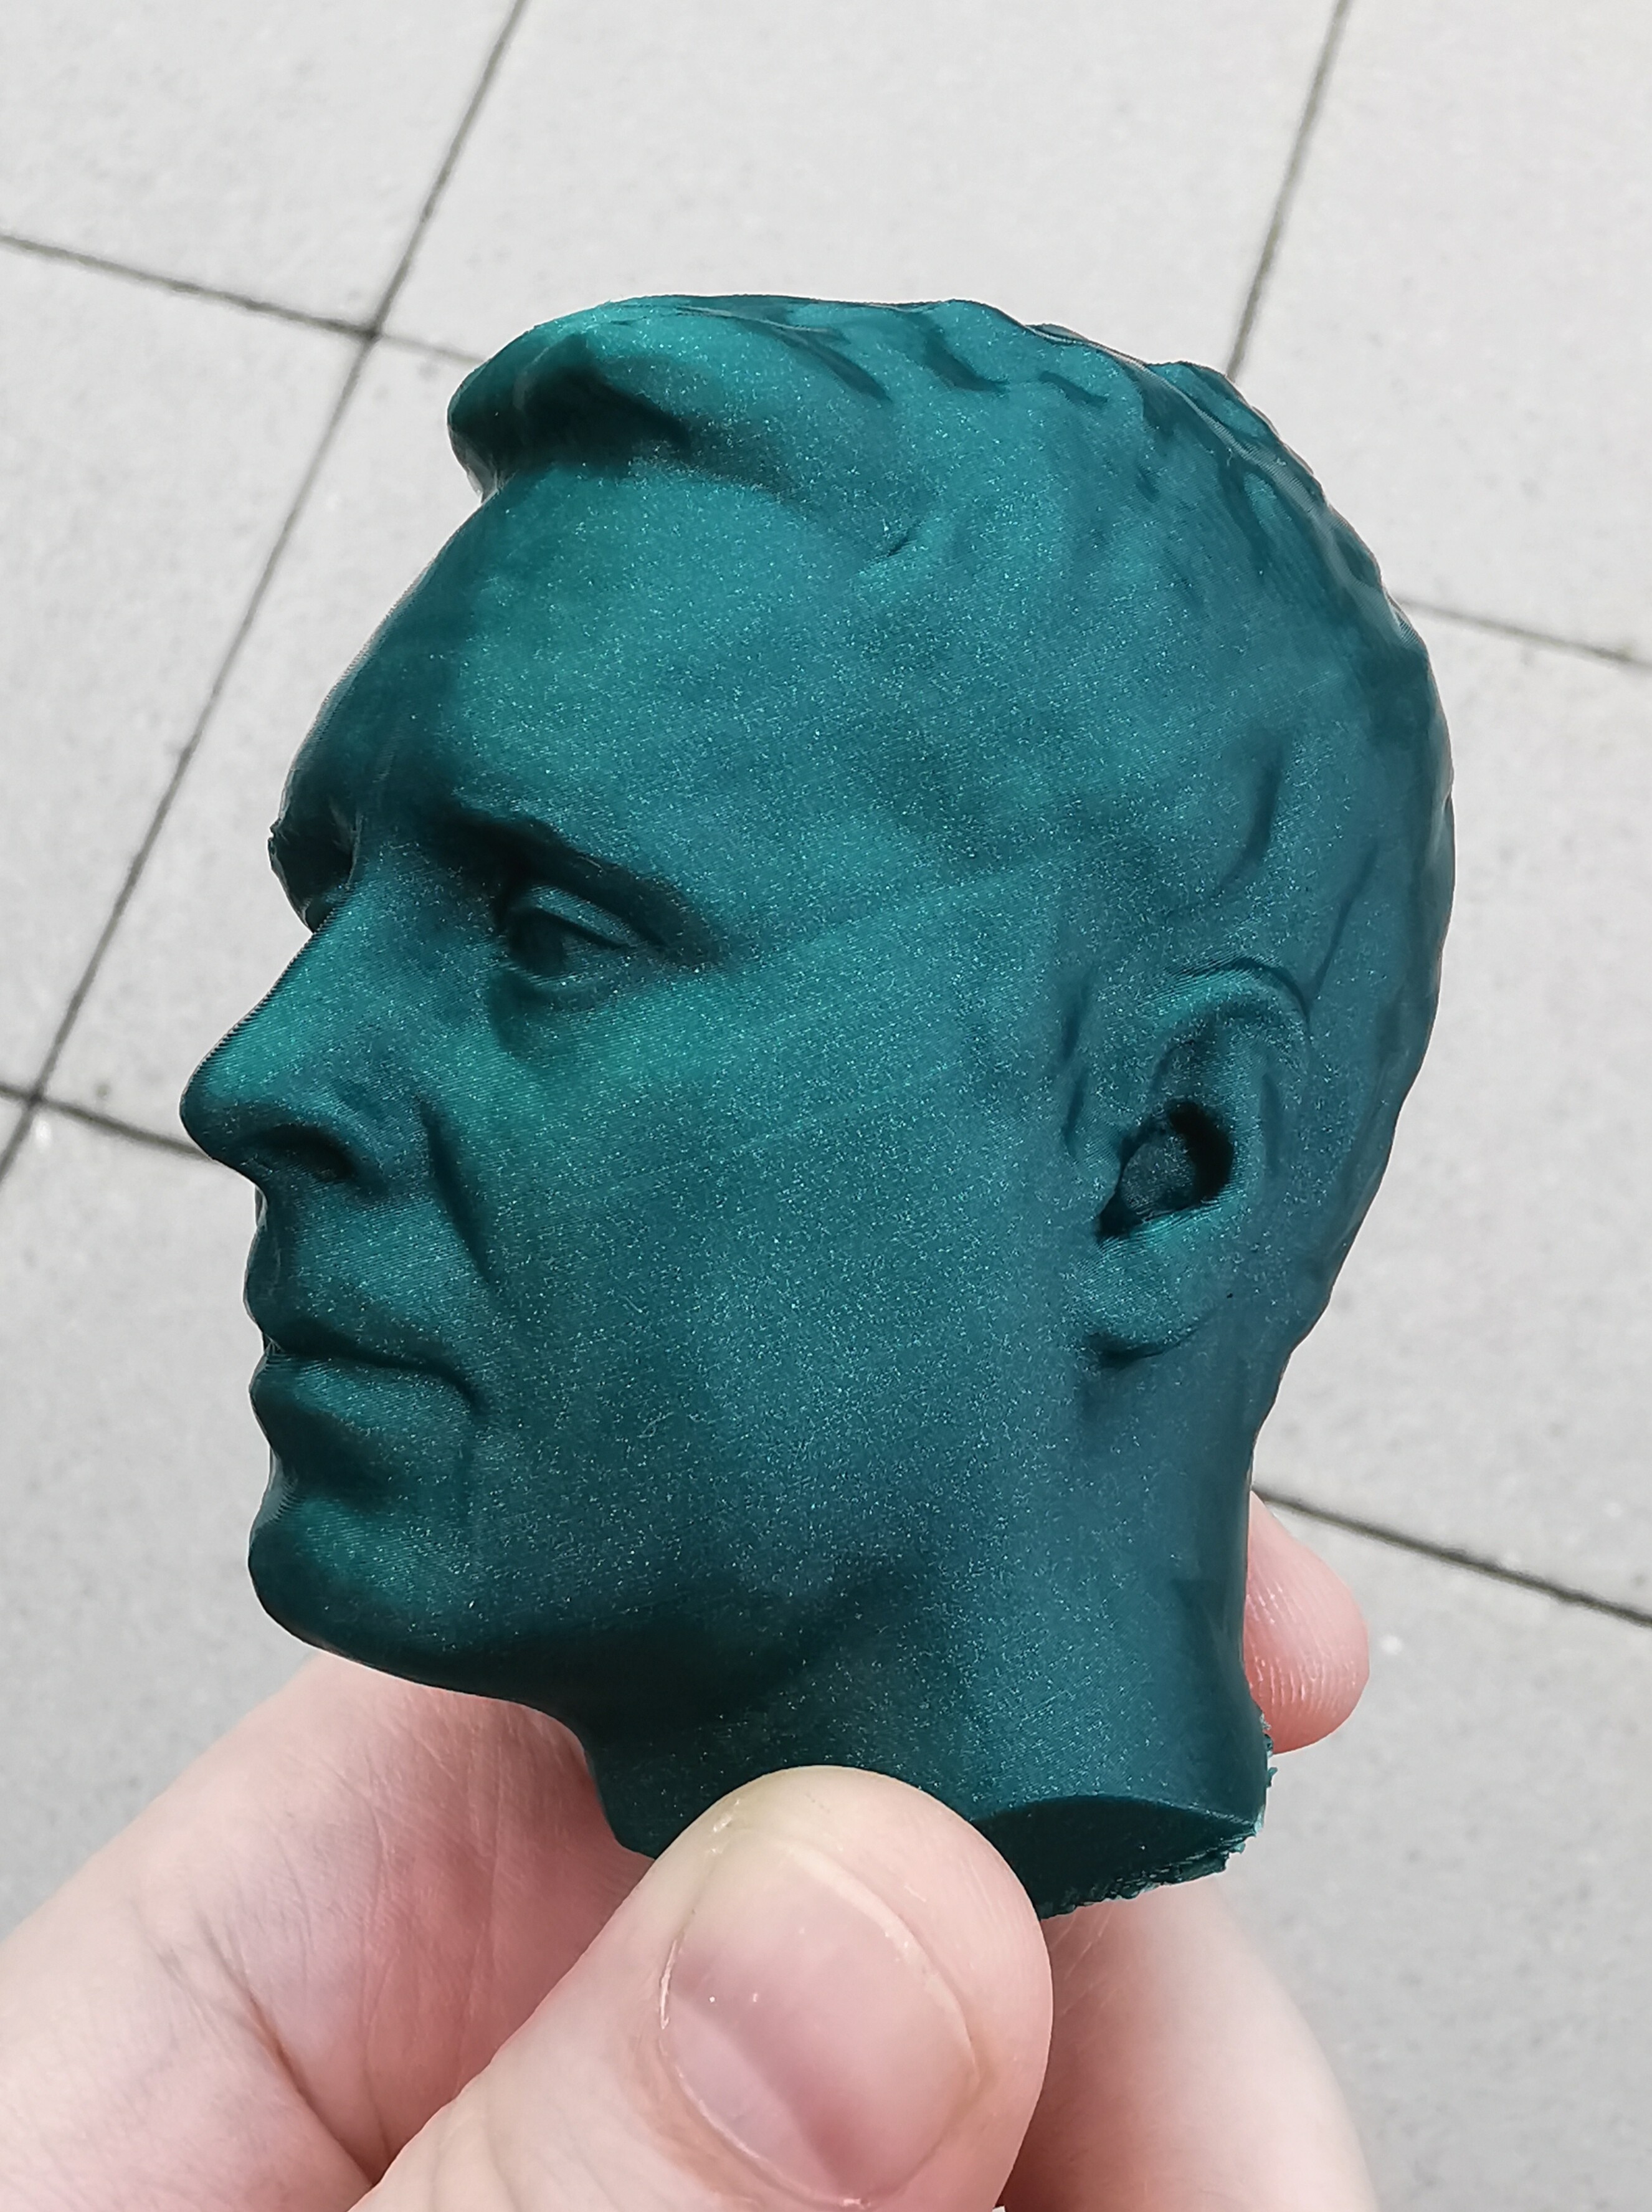
Printed my head in 3d with my Ender 3 V2, 0.12 layerheight, for twst purposes an like the result. Only done slight smoothing and retouching the hair structure in ZBrush. Now it’s time for some action figures ![]()


13 Likes
Great!
thank you for sharing.
I hope to receive mine soon.
BR,
Giorgio
1 Like
Hi, @ivan, it’s so good! Thanks for sharing!
1 Like

1 Like
Beau travail ! !!
J’espère avoir le mien rapidement ! !
1 Like
Can’t wait to get mine and start playing!!!
1 Like
Wow very cool. Experimented also scanning my head today, but not nearly as good results. Did you retouch the eyelids also, they are so crisp? Or did they come out like this?
On face mode the scanner lost its tracking quite often. So i had to switch to body mode which has less resolution. What was your setup like?
I put the pop on a tripod and sat on a turning office chair. Adjusted the tripod to 2 heights to get the whole head in two scans.
1 Like
My setup was the same. But I placed the tripod so i could still rotate on the chair and be nearer to POP (face mode, “too near” distance instead of “excellent”, allows more detailed scans but for smaller areas). I started with scan of eye area and when I turned around i alway raised and lowered my chin for both higher and lower parts of my face get scanned. When I was done with the face i pressed “pause”, changed the settings so POP can see and scan my hair, too, and repeated the procedure for hair.
one can either raise and lower the head for all the hair to be scanned or maybe reposition the tripod.
During the whole scanning (done on my smartphone) I held the smartphone in front of me to make sure POP keeps track with turning speed.
No retouching to scan of my face was done.
Depending on your needs you might scan hair separately in other mode and merge them in Handy Studio on PC.
6 Likes
Hello Ivan.
very good, and thanks for sharing,
Q?, Scannig what settings did you use all the time. please advise.
Oscar,
Hi! you are welcome. where maximal details wanted I always choose “face” mode and go as close as possible to the object and adjust gain and brightness as long as in preview POP even at that distance shows/catches as much information as possible. and than it is all about keeping approx. the same distance and scanning around object at speed scanner can keep pace with.
3 Likes
very impressive ,how long and what details you made it happen ?
Hi! If you ask how long did it take to print: approx. 3hrs. Scanned in “Face” mode, but I think even other, less detailed scan modes would look the same, as it is minimized.
It took maybe 1minute to scan.
It’s really not hard to do. I got these results with my very first try to use the scanner. Literally took it out of the box, installed the software, plugged in the scanner, poked around a bit with the user interface, then did a scan. Didn’t even read any of the documentation, first. Was pretty pleased with that!
Didn’t expect it to do very well with my beard, but I was surprised by how clearly it saw it. And I can roughen those areas up in Meshlab to make it look a little less “blobby” when I get around to printing. My plan is to make pilot busts of me, for my radio controlled scale airplane models. 

3 Likes
just 1 min,very fast, maybe 5-6 circles I think… for a new guy ( rookies) I mean…
1 Like
You can trust me, it wasn’t my first try  It did took some practice before.
maybe you can post a picture of you printed out!