Here you can see that the standard fusion settings result in an excellent resolution - but the point cloud is also very “chaotic” - later you will see how it looks with the advanced settings.
Jewelry - Another Ring - more organic shape Size: 22mm with and 27mm high Scan preparation: AESUB white scan spray (I forgot to take photos with the scan spray )
Jewelry - And another Ring - this time a full finger ring - articulated ring
Size: 90mm long Scan preparation : AESUB white scan spray
Here I used my scan helper again and made a hanger with wire to scan it upright
Here are a few miniatures.
First a really small figure with just 25mm height and very fine parts.
The result really blew me away because you can even see the really small hints of the teeth.
Since this figure is already finished with light gray primer, I don’t need a scan spray
Scanned on my scan-helper. Fusion settings : 0.02 standart (max) Meshing : 6 (max)
and a few measurement results - the fine red line shows what I measured and the result is in millimeters.
first of all, the skull on the helmet, which is just 2 mm in size:
As already mentioned, I still had plans for the Warhammer figure.
I still have the same figure in individual parts and wanted to see how well it works to scan them and then put them together.
Da die Teile in einem doch recht dunkelem grau gehalten sind (auf dem Foto sehen sie heller aus) , habe ich sie auch wieder mit scan spray vorbereitet.
Then the base - I did not pre-treat this with scan spray:
The base has a diameter of 38mm
I didn’t need a scan helper for this one as it is very easy to scan
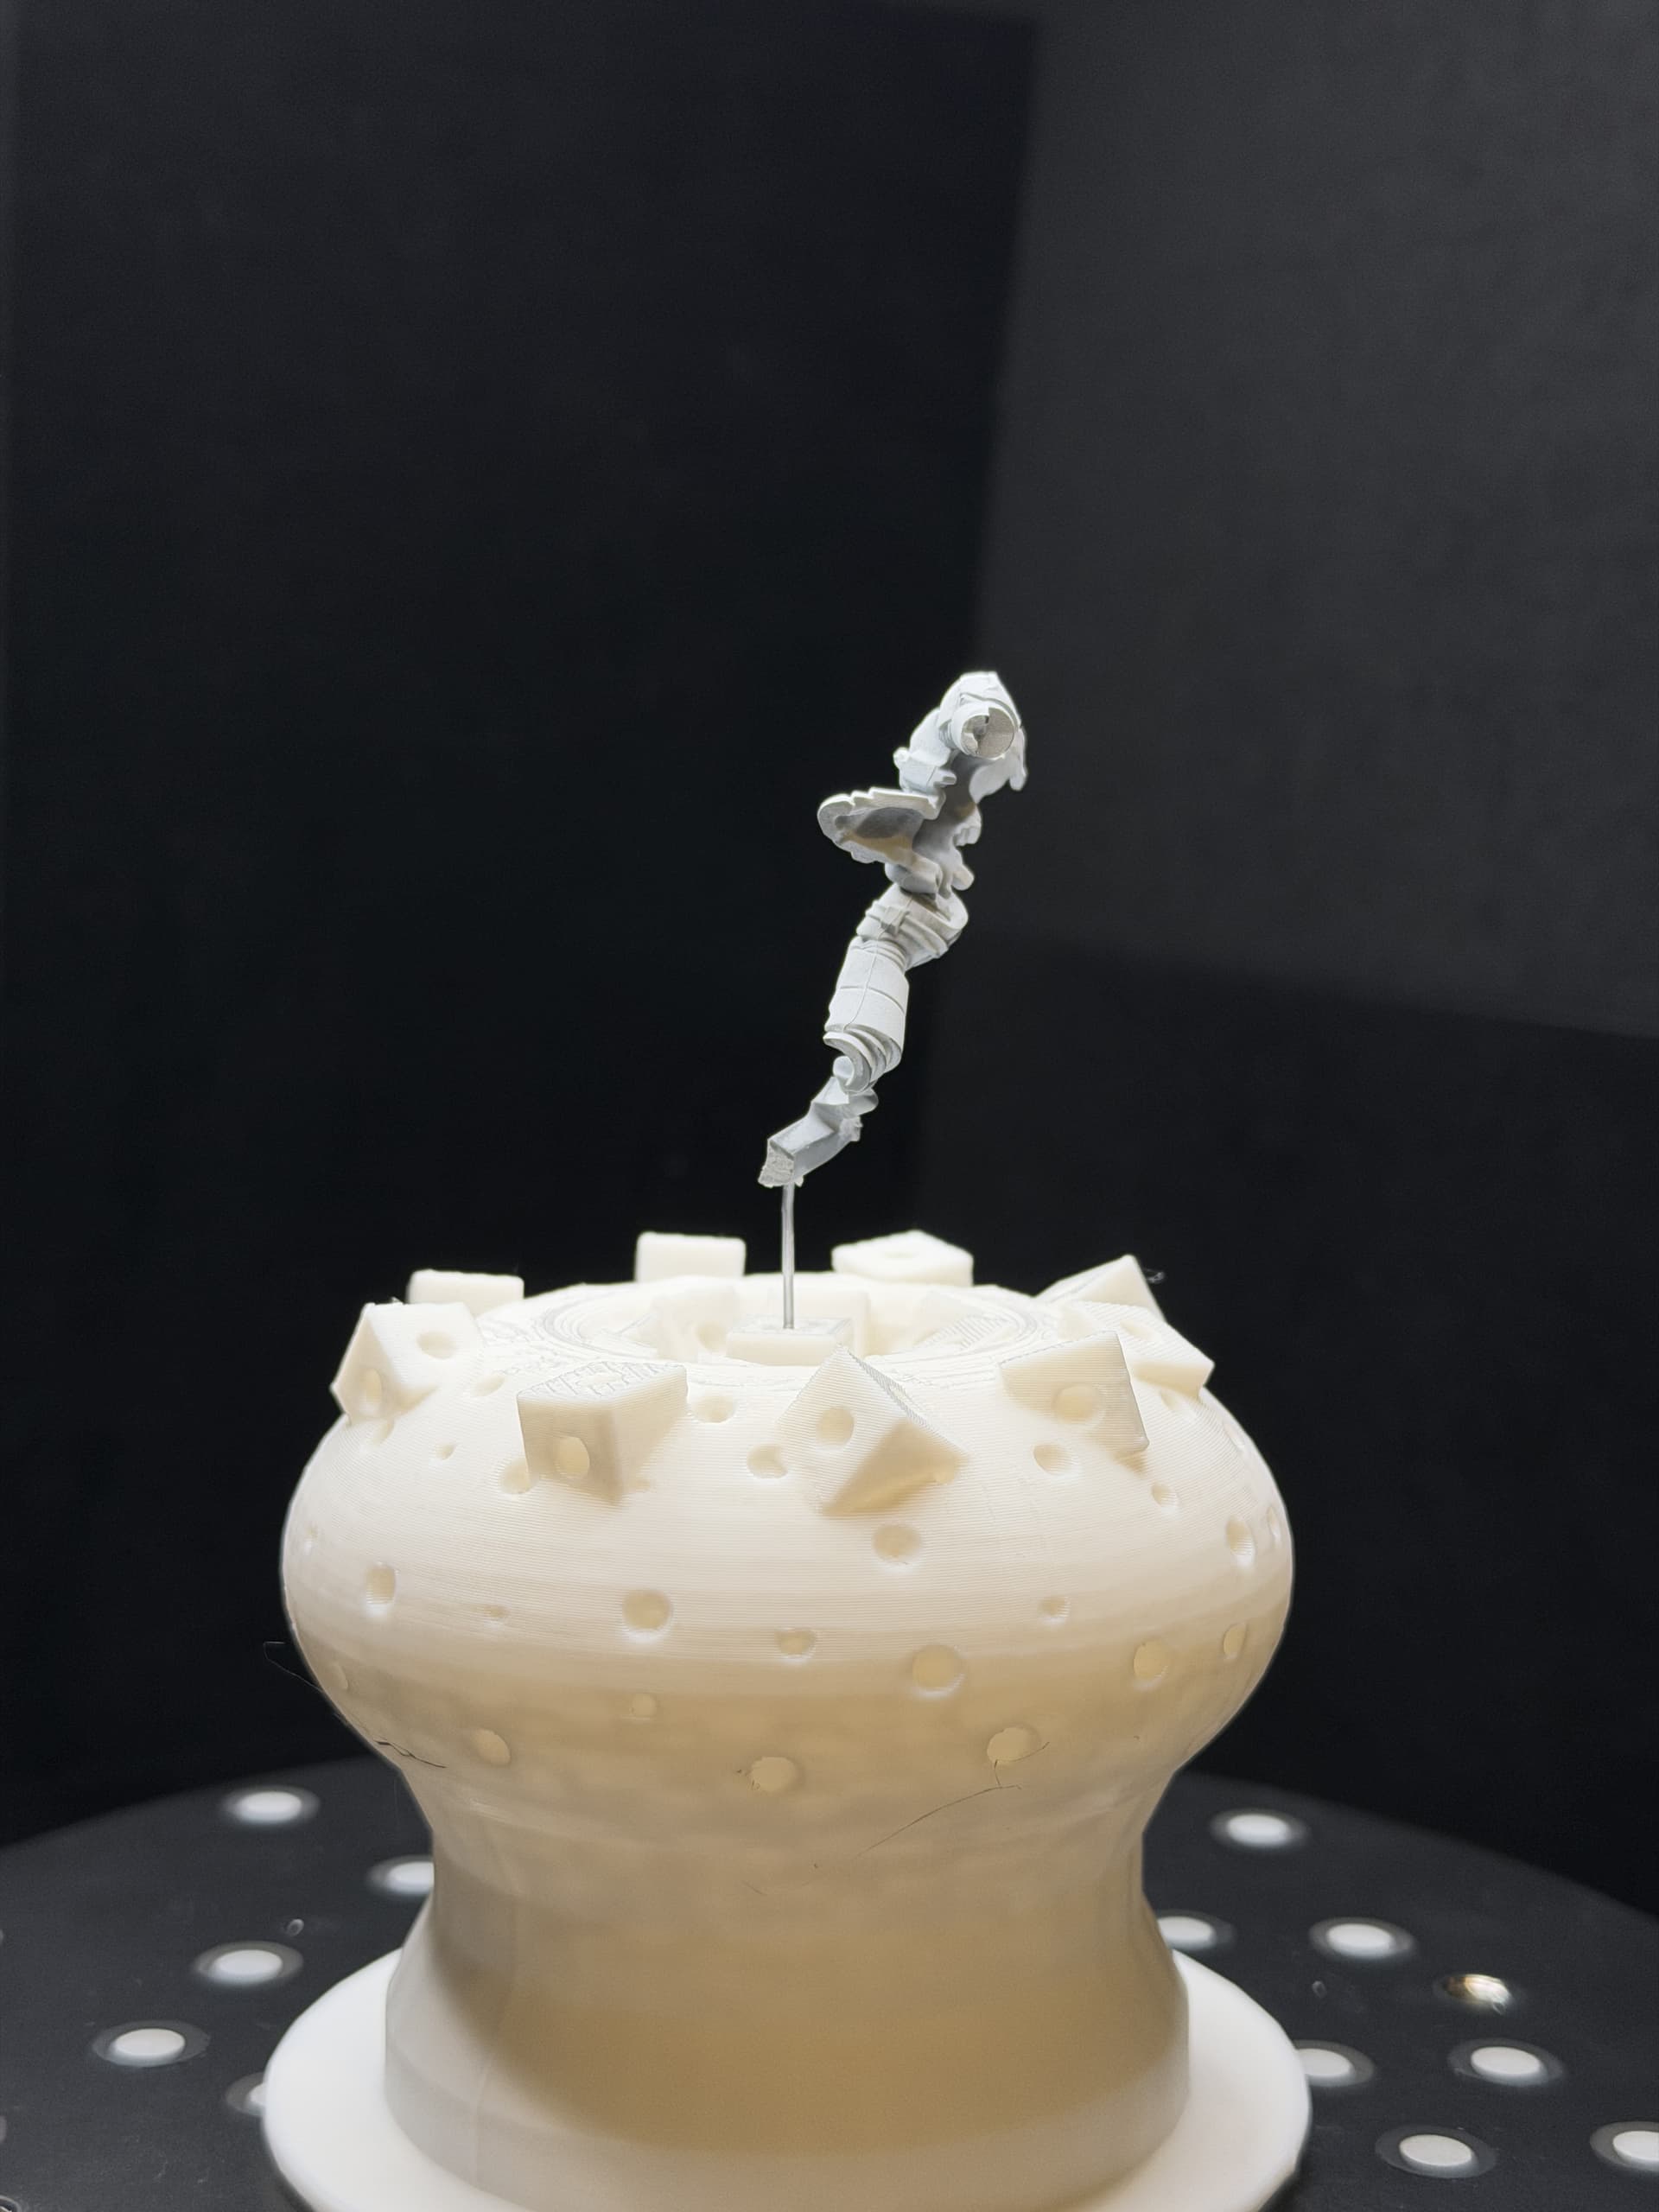
And last but not least the middle part with the head.
I’m showing this last, because there was actually one part that didn’t really work out.
The reason for this is that the scanner and the software support is still a beta version and there may still be a few minor problems.
I will show you shortly afterward that the scanner is also capable of scanning such “problem areas” on another object.
As you can see, the gap at the head part is partially closed here. Since I’m planning to work on the parts a little anyway, I’m ok with it.
I then edited the individual parts a little in Blender: I smoothed out the places where the parts were attached to the frame a little and opened up the gap in the head part again.
last but not least the parts were positioned correctly and animated:
After all these small scans, a larger object.
Since the MINI 2 has a larger single capture range and also the IMU, I scanned the whole thing freehand.
The height is 21 cm
at the moment i did not upload it anywhere cause it was a fast ugly Blender work.
i maybe will upload it and post a link here and on Facebook but just if I don’t do some changes to it in time to upload a better version. (like in the next 3-4days)
Hey Steamkraft. I know this thread is a bit old now, but hoping you might see this. The base you’re utilizing for the miniatures with lots of features seems very useful. Do you know where I might be able to find one or a file to print that’s similiar? I’m also trying to scan some miniatures using my Metro X but struggling a bit to find a way to get multiple angles properly.
Also tips on which mode to use, currently I’m using the full field, feature scan or marker scan single frame auto turntable. But you’re getting better results just with continuous and whatever setup you have. So if you have any tips It’d be greatly appreciated.
I’m sure you could find a 3d print file of one similar on many of the 3D libraries on the net, or @Steamkraft might be able to provide a scan if you don’t have a 3d printer. There are plenty of companies offering reasonable print services