3DVF.com - Showcase - Revopoint MINI 2 3D Scanner

Revopoint asked 3DVF.com to check out the new Revopoint MINI 2, and we gladly accepted.
Our showcase article is coming soon, and in the meantime, I’ll share scans I created using MINI 2 in this thread. Feel free to subscribe to the thread and ask for specific scans!
I should mention that the showcase article is sponsored, but all of the 3D scans are of course ours, and we are free to scan whatever we like.

You can buy the MINI 2 over there:
Global: Revopoint MINI 2: Blue Light High-Precision 3D Scanner
US:Revopoint MINI 2: Blue Light High-Precision 3D Scanner

Let’s open the package: lots of accessories are included including a calibration board, and a case that will allow you to store & transport the scanner.
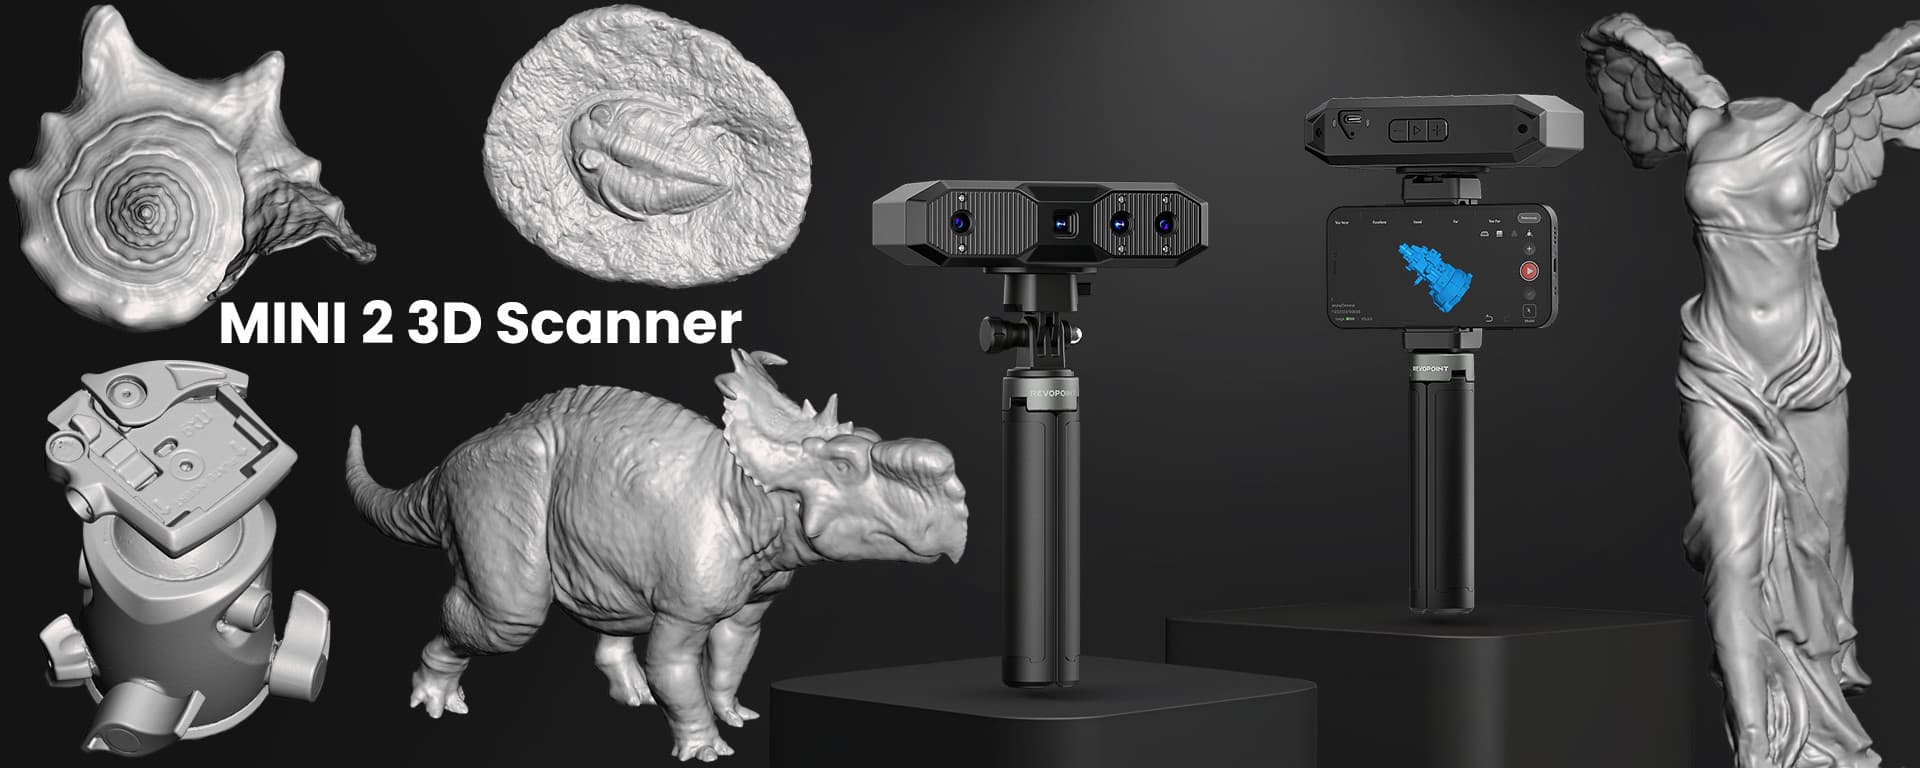
You can scan tethered to a computer, wirelessly or using a smartphone. For beginners, I recommend using a computer and the USB cable: just attach the scanner to the small tripod, plug it to the computer, launch the software, and you’re ready to go.

Now, let’s check what this MINI 2 is capable of!

Subject: seashell
Size: about 9cm / 3.5 inches long

I used scanning spray, mainly for the interior which is very shiny.
Please note that on the following picture, you can sea some kind of break on the left, that healed as the animal grew.

And here’s the scan: lots of details!
(two passes fused together within Revo Scan)

Below, the break I mentionned earlier is clearly visible. This is not a scanning error but a real feature.

The inside is always tricky, since you can’t really access it easily. There was a bit of noise, which I cleaned up in about 30 seconds using Meshmixer (free) and the ShrinkSmooth brush (very useful to clean noise and spikes without flattening the underlying surface: the end result is therefore quite natural)

Subject: crab
Size: about 9cm/3.5inches in width

Overall, an easy subject to scan. The only tricky area are the eyes, since there are overhangs. I cleaned up some noise manually.
Here is the end result:

More 3D scans coming soon! Feel free to make some suggestions.

Buy the MINI 2:
Global: Revopoint MINI 2: Blue Light High-Precision 3D Scanner
US:Revopoint MINI 2: Blue Light High-Precision 3D Scanner

1 Like

Beautiful scans Benoit

1 Like

Subject: Winged Victory of Samothrace (small reproduction)
Size: about 10.5cm/4.1 inches high

The real one is way too big to be scanned using the MINI 2, so I scanned a small reproduction. It is made of white plaster, so no need for scanning spray.
No difficulty, this scan was pretty straightforward. the only tricky part is to manage to scan a few areas that are trickier to access (such as the area between the bottom of the floating part of the dress and the base of the statue).

1 Like

Subject: coin
Size: less than 2.5cm/1 inch in diameter

An old coin with lots of very tiny details, an interesting benchmark!
I used scanning spray.

Screenshots done in ZBrush (the default matcap reveals more surface details than Revo Scan or Meshlab).
Attempt one: continuous mode, objects around the subject to improve tracking.

Not bad, but let’s follow @PUTV 's technique and use single shot mode.
On the first attempt I shot the coin at about 45° (turntable at the slowest speed, one shot about every 5 seconds, which gave me 25 frames), on the second attempt I did two passes at different angles and waited 2 or 3 more seconds between shots (33 frames).
The end result was similar in both cases. I got a bit more noise, but also finer, crisper details than with continuous mode:

I think there is room for improvement. One of the most obvious ideas is to replace the AESUB Orange scanning spray I’ve been using with something like corn/rice starch mixed with denaturated alcohol. This should create a thinner coating on the coin. The tricky part is to find the right mixing ratio and to apply it evenly. I’ll try using a spray bottle and I’ll share my results.

1 Like

The problem here is Benoit that MINI 2 will capture the 3D spray even the finest one , using rice starch or any other starch will not help the powder is still greater than 3 microns .

There is only one what is Attblime 3D Liquid at 3 microns but expensive as hell .

I tried even a nano titanium oxide , at 20 microns ( 0.02mm) still visible .

MINI accuracy according specifications is 0.05mm , what is of course not true since it can capture easy 0.02mm

AESUB Blue is 15 microns still visible

1 Like

Thanks for the feedback! I guess instead I should try to tweak other settings, then, such as the way I capture the shots (angle, number of shots).
Anyway, switching to single shot mode was really helpful, thanks for sharing that tip on the forum!

Coming soon: more tiny objects, and much bigger subjects!

Subject: Human teeth - plaster mold created by a dentist.

I wasn’t expecting any issue whatsoever, and… Indeed, no issue. Every “defect” on the scan is real, there are small bumps on the plaster.

Subject: fossil (fish)
Size: the fish is about about 7cm/2.75inches long

A very flat fossil. Unfortunately a crack started to appear, but thanks to MINI 2, let’s create a “backup”!
I shot the photos after the scan, which is why there is some scanning spray. The fossil is dark and reflective.

I placed a few modeling clay balls around the subject to help with the tracking. Single shot mode, about 15 shots at 45°. The fish was in the “excellent” distance range since I wasn’t interested in the edges of the stone slab, which means that the edges were a bit too near or too far: if you look closely, these areas are a bit noisy.

Fossilized fish bones are visible.

Want to scan your own fossils, teeth molds and more? Get your MINI 2 here:
Global: Revopoint MINI 2: Blue Light High-Precision 3D Scanner
US:Revopoint MINI 2: Blue Light High-Precision 3D Scanner

1 Like

Another attempt at coin scanning. I tried another technique.

Previous attempt:

New technique:

I’ll try to refine this approach in the coming days, but it looks promising!

3 Likes

Let’s scan a dinosaur! Or at least, a dinosaur firugine.
About 18cm/7 inches long.

No spray, Since I wanted to create a textured scan.

Get your MINI 2 here:
Global: Revopoint MINI 2: Blue Light High-Precision 3D Scanner
US:Revopoint MINI 2: Blue Light High-Precision 3D Scanner

1 Like

Really nice set of scans there, and a good diverse set :slight_smile:

Subject: an old, unused drawer key

I used modeling clay to keep the key upright, scanning spray. No issue whatsoever.

Subject: a tripod head
Size: about 15cm high

My good old Manfrotto tripod head. I figured this would make a good use case for design/reverse engineering.
Since the tripod head is dark and has reflective parts, I also used scanning spray. Two scans fused together using Revo Scan.

Get your MINI 2 here:
Global: Revopoint MINI 2: Blue Light High-Precision 3D Scanner
US:Revopoint MINI 2: Blue Light High-Precision 3D Scanner

1 Like

Our showcase article has been published! The article is sponsored by Revopoint, but each and every 3D scan showcased in the article was created by us.

I included a few tips and tricks in the article, to help beginners.
I also included some information on how I managed to get more details when scanning coins. I still feel my technique can be improved, but I’m quite pleased with the result.

Get your MINI 2 here:
Global: Revopoint MINI 2: Blue Light High-Precision 3D Scanner
US:Revopoint MINI 2: Blue Light High-Precision 3D Scanner

1 Like