My First Range test scans

Just to not to make another topic, will post here. Mine came a few days ago. Was a bit ill, so the only thing I could try to scan in the office was an old computer. And thus I could make only a bit of a comparison to Mini.

Since there is a link to my review in this post, I’d call up @PopUpTheVolume since she might wish to get it noticed

Here are a few home-brewed (in all senses) scans made using Range. Both are made in one scan without alignment with an android phone. Agree, I should make those in a few scans and then align those to make the picture more or less complete, but didn’t do it.

What was good, the tracking is really better than with the Mini. Yes, their poor tracking behavior is easely recognizable, but since Range has a that wide window, it’s really better.

So… A part of bathroom made in a single scan:


Comparison between General and Body mode separate scans, both in HQ mode. Note the tile seam:

A sofa scan. Hit the 2K frame limit:


A kind of small comparison between Mini and Range. Note the alignment problems with Mini (had to do a lot of scans with continuous tracking failures, though couldn’t align them correctly fast enough):


Comparison of the scans of a hand. Also had some tracking issues with Mini. Obciousely, the Mini’s scan is incomparably better, though note that some ammount of details is in fact digital noise that I didn’t filter out:

And a link to an article made by me. Since it’s in russian, it is more kind of report. Though there are some unboxing photos along for those who haven’t recieved their Ranges and a few more scan samples (most of the Mini though) that someone could find curious.

3 Likes

Nice scans! I like the green rendering! :green_heart: What software did you use for that rendering?

Sorry Ignat but I have to create for you separate thread here to show off your first scans , as it is worth the space .

Very interesting results , I see you go beyond and tried something else well it worked .
The bathroom and kitchen looks so cool !

2 Likes

It is 3DSMax viewport rendering with AO and turned on. Shadows are set about 30% or they would be just plain black. AO is also diminished from 1.5 default to something like 0.5 or 1.0 I don’t remember.

2 Likes

One more scan. It was generally a test and a phraze from my friend: “Hey, can you scan me?”… Scanning itself was done manually and took about 1-2 minutes just plainly at the yard with my friend standing on asphalt. But to get the result it took me literally about 12 hours if not more. It was a curiosity leveled to “I’ll get this scan done anyway!”.

“What took so long?!”. As I’ve seen (and you might too), theese kind of scans have a quite ammount of imperfections like a lot of double surfaces of that lovely drifting tracking, so when you try to mesh it, you’ll get a double surfaced nose and things alike. Sure, there might be a better method of dealing with those, but I’ve just gradually filtered in CloudCompare one bug by one. Had to manually add some parts like missing fragment of the hat, remove holes in the ear and in some more places and so on.

And considering theese poisonous frames that brakes down consistency I have some feature to implement into RevoScan (a merely easy to make one) that can help dealing those at the Raw level just before even fusing the vertices. I think will post that in an appropriate section, but I have some fear nobody except PUTV really read those…

Anyway… One more thing that made this one very long, I wanted to get 11 level of octree depth in CloudCompare. It lets to exctract some more details even they don’t benefit to the appearance that much. But the “11 level” of it make it way more demanding to the point cloud quality. And when there are always 2-3 layers of surfaces in fact, it might pick up theese and make resulting mesh very buggy. Don’t ask me why I haven’t ensured those overlaps were removed - maybe they were deep enough to eat actual details like ears or the hat thickness, I just don’t remember. Maybe that was just me making it the wrong way. But the general idea was simple - make it 10 octree depth and it will be just OK, make it 11 and have bugs over bugs.

This how it did look in RevoScan. To the left is the original scan result in point cloud form, to the right is a mesh generated at RevoScan at maximum quality (6 it was AFAIR). Notice missing parts at the hat and between legs.

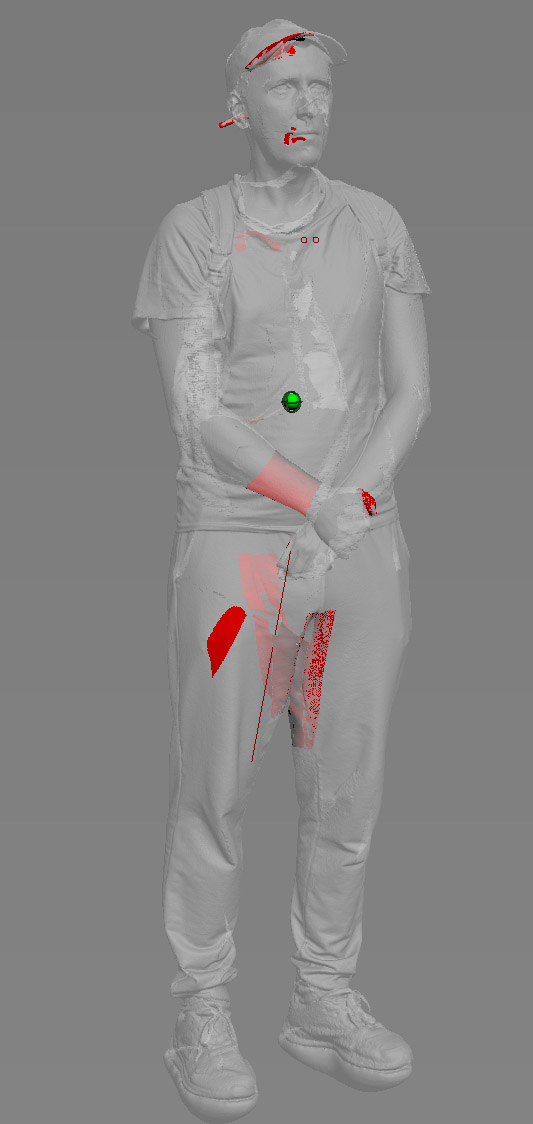
This shot shows why there was no way to directly sew up those missing parts of the hat and trousers… And how much problem that hat did make )

To solve this missing parts’ issues I had to design them manually. In general, they looks like this. This is a stitch for the trousers for one side:

If to look at all those “manual parts”, the look this:

For example, I needed to remake a handle of the rucksack and a sticking out strap of the hat.

The more or less end result I had to finish up in ZBrush since there were still a lot of stitches of manually deleted subsurfaces, so I needed to remove those. Apart from that it is still a scan and not a ZBrush work. The result look like this:


The details are actually way nice… And yes, I love that ZBrush shading too.

One thing that is stil unknown to me, would the stabilizer really help with tracking drift and loosing of alignment (since it costs me a lot of time dealing those) or the difference would be too marginal to really bother. I have some idea of second hand stab that can be used with Range, but, lets say, it not my primary concern now.

BTW: Mini was sold out for good. Yes, there are some things you literally can’t do without it, but it takes so much efforts to get a result, that you think twice do you really need to make those. It should be the “little helper” that you always can take out from the shelf and make a quick scan, but this thing actually demands worshipping it, so it goes. Interesting, there is a company that seems to have some agreement with Revopoint that Revopoint will give them Minis and they will use their own software with it. Will this make things better or not, would be interesting to know, but that’s more of “it would be interesting” and nothing more.

3 Likes

Hi Ignat , very good job on finishing the full body scan .

There are more people that read your post and not only me :wink:

I recommend you update the Revo Scan 5 to the last version , things got little easier if you use Range , less cleaning when fusing with Advanced mode algorithms ( my favorite one was brought back to RS5 )

Regarding MINi it is still selling on Revopoint website and Amazon , so what was sold out exactly ? Or just a internet rumors ?

I never heard anything about that from our team … so can’t confirm anything .

1 Like

Hi Catharina

some good stuff going with v5.0.7.better tracking, better fps, better fusing. I like it a lot!

But could you please explain the difference between standard and advanced fusing mode? when would you use which onr? what is the difference? :thinking: maybe even in another thread (under tutorials maybe?) for everyone to find easier?
TIA and best regards

1 Like

Thanks for the info, will do.

No, I didn’t mean that “Revopoint will give them all the Minis”. I mean that some units will go there, so they will sell them with their own brand and their software. Check “RangeVision Neopoint”

That are just 2 types of algorithms, the advanced is the same as it once was in Handy Studio and in Android devices , it is actually very good and semi automatic cleaning the scan data while fusing from overlapped frames .
The Standard has a raw algorithms , it allows you to process scans like trees or objects that have lose elements without removing the lose details while fusing , so if you for example fuse a tree with lose leaves use standard fuse , and for solid surface objects use the standard .

1 Like

Ah ok , they created for them kinda version like POP2 , the specifications are the same as POP2, Revopoint creates for other customers sensors and stuff in the past so nothing new .
There are more scanners other than we know from Revo that was created for other companies .
It is always better to support company like Revopoint because they create their scans in house and not reselling it from other companies like for example Creality do . This ensure you have a long support for your device and software and not just a one ride pony .

1 Like

Would it be possible to have interchangeable firmwares in the future? It seems that Neopoint has special firmware to be compatible with RangeVision Studio software that uses single frames for scanning instead of continuos scanning - something the community has been asking for so long but wasn’t possible until now :unamused:
But really it’d be amazing if we had more software options for scanning and not just post processing!
image

1 Like

Single frame scanning require different hardware function , it is impossible to handheld scanning using single frame for scanning .
The object and the scanner need to be on very specific distance and angles and very steady while processing . In most cases the turntable is in full synchronization with the scanner and software and usable for most small objects only .

There may be future Revopoint products that can support this kind of scanning techniques with their hardware , but don’t expect to get it as an additional option to your old hardware ,
As that would make the new company not so happy about . Why would they want to sell something that everyone get for free ?

Don’t get me wrong , I would love to have single frame scanning with my MINI as that would be the most valuable and precise option here that’s worthy.
With 0.05mm/0.1mm not as much

1 Like