Learning how to 3D Scan. @TinWhisperer 's journey

I have been wanting to get in to the world of 3D scanning for sometime.

Then the POP 2 was released on Kickstarter which finally made 3d scanning approachable.

I backed the project in early December 2021.

April 13 2022 the POP 2 Premium Package arrived at my home.

Today I had time to get started and I set up everything up on my desk.

Here are some of my first scans of an ammonite fossil.


The next scans were of a vintage Toyota badge.


It seems to really use up system resources but made it through.

Next was a handmade mug.

This link is to a navigable model of the mug.


4032be0cb1d9cd20d5ab13b7679c34b2dbe2a6d1_2_478x500


So far I am having a lot of fun with it. I don’t have any real workflow figured out yet and I am still unfamiliar with the software but it works!.

Revopoint thanks for making this scanner.

I’ll post more as it happens.

6 Likes

Looking good ! For your first time scanning you did a great job :+1:
Try with the setting lower in the depth view (bottom window) a dark to light grey is good, when its white it’s over exposed a bit

3 Likes

Thanks you your try-outs.
Wish you enjoying the backed POP2.
I am still waiting for it.

1 Like

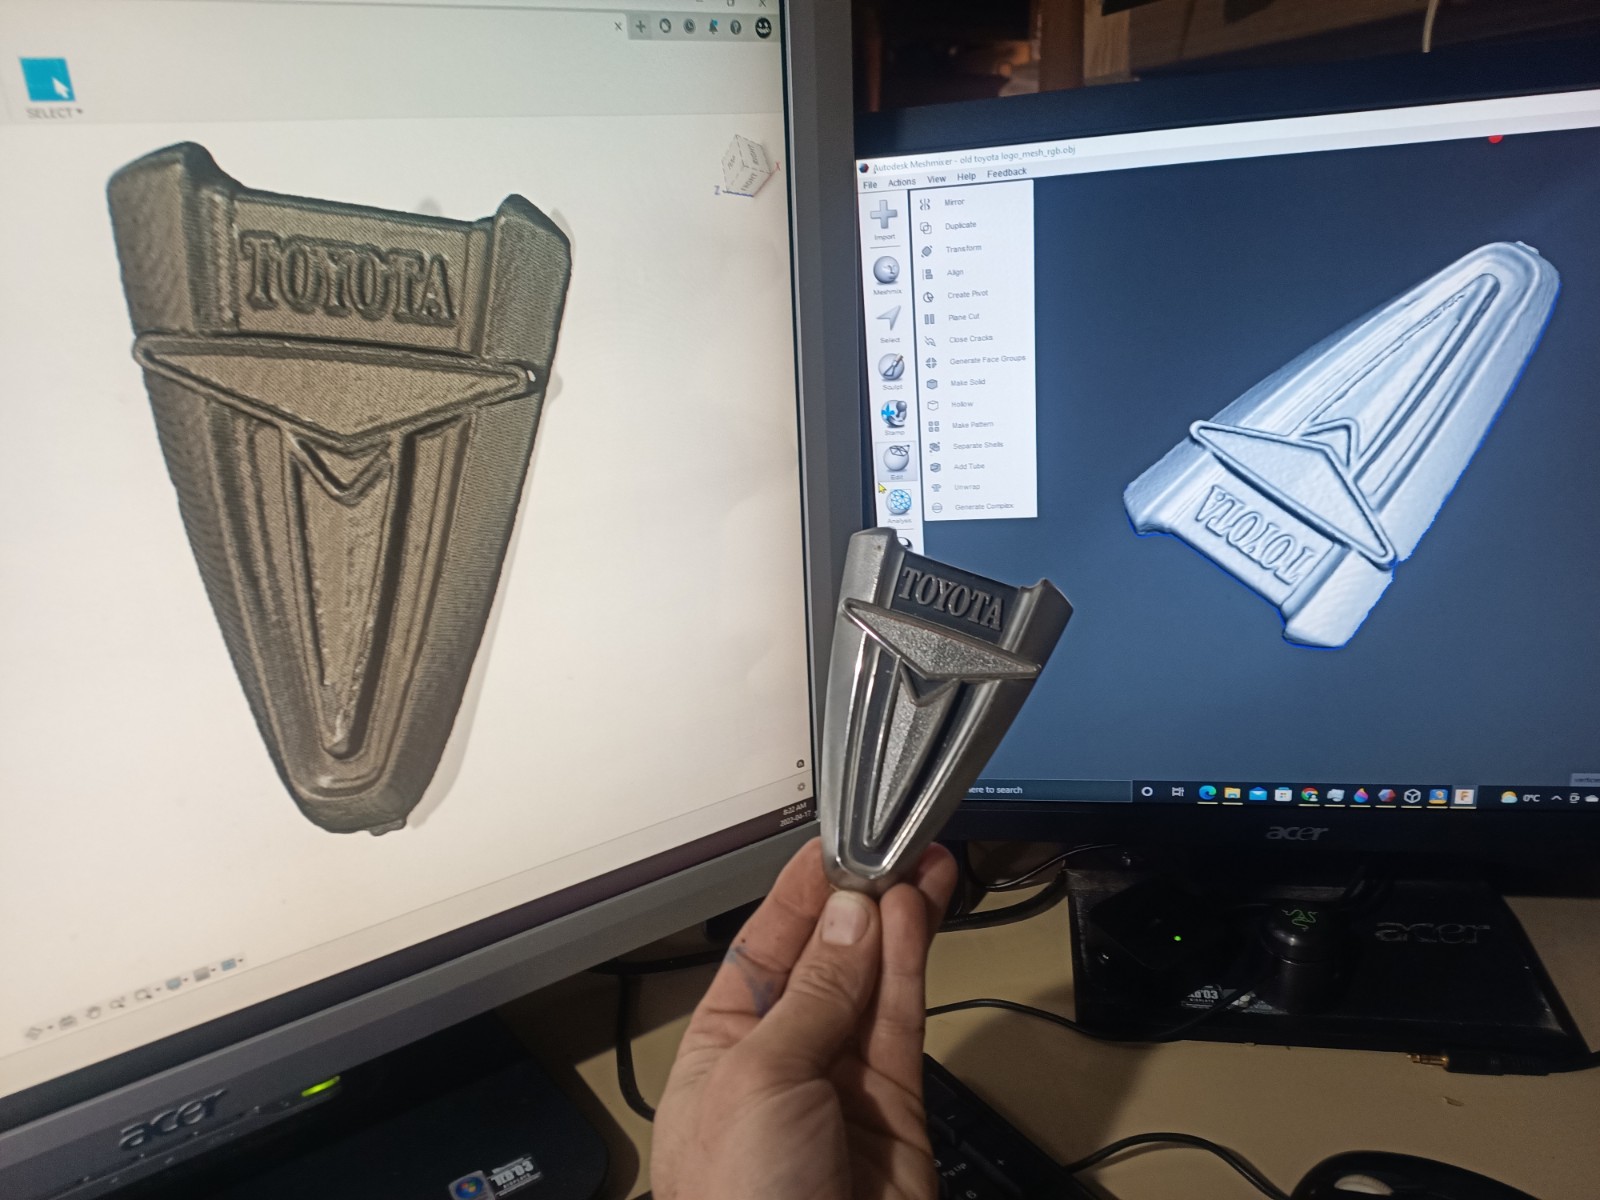
@TinWhisperer great results ! but as @Johnathan mentioned your gain setting ( Depth Camera) is much too high , you will easy lose the track at that setting . Usually 1-2 maximum, unless you have a darker surface . So next time you run into trouble , set the gain down !

keep up with the great work !

3 Likes

Thanks @Johnathan @Johnathan @jeremias_29 I will adjust that setting and keep trying.

Session 2

Scanned an old tape measure.

Some of the shiny bit did not show up but that is to be expected I gather


Odd looking texture file?

And here is a interactive model :arrow_down:


Received my CD key last night so maybe later today I’ll start to learn and work with Revo Studio.

2 Likes

How did you get the Toyota badge to scan that clean?

I used marker mode on the turntable.

I did quite a few revolutions I can’t remember how many.

I didn’t have a revopoint studio CD key at the time so I used mesh mixer and fusion 360.

the results of the 3rd and 4th session.

a small seashell

and a toy elephant

Fusion (this link seems to stall out.)


The post processing is something I’ll need to spend al ot more time with.
It is quite an art and I have so much to learn.

2 Likes

seems like this link the elephant model is working great now! check it out for yourself.

1 Like

Yes it is working !
you forgot to close the holes :wink:

2 Likes

lol yeah,

. I have no real post processing skills yet.

I took that scan straight from revoscan and loaded them into Fusion 360.

I rotate it to be square with origin.

I use this one tool on it

and posted it here.

Still not sure of the work flow or software.

I have used fusion 360 a lot but for sheet metal assemblies and CNC plasma CAM.

so my mesh skills are zero so far. It is a whole new world.

1 Like

You need to remesh the scan for smaller size other way would be too big for share , I am doing organic modeling for the last 24 years , my specialty . Scanning is one thing and proper processing another, then you have organic and hard edge modeling 2 different process and approach .

I am preparing right now another tutorial , for merging objects etc…

1 Like

I kept working on learning this process some more this weekend.

Starting scaning a Homelite gas powered circular saw .

Thought is was a good way to start scanning larger more complex items that have to be pieces together afterward.


still struggling with getting the bottom to align but happy with the steady progress.


I also scan a Schleich toy sheep

it stand 2.5" tall and 3" long


1 Like

Sometimes it just don’t want to work for some reason even with the manual points , but finishing today the Cloud Compare tutorial for merging the objects , it works superior to Revo Scan

good job scanning your new stuff , looks very good .

Thank you.

I did try Cloud compared too ( keep in mind I know nothing about Cloud compare) but for some reason it was still having trouble aligning that same bottom panel? I even tried to rescan the bottom a couple different ways and it just does not want to attach that bottom panel.

I think I’ll order some 3D scanning spray and then clean up the circular saw quite a bit.
I can see that I am going to have to set up a little bit of a studio for 3D capture in my office.

Area and item preparation seems to be one of the most important aspects of this game.

1 Like

In Cloud compare it like to have a lot of markers on any directions , then you can see the errors you made while placing the markers . Make sure your scans’ holes are not closed , sometimes Revo Scan close the holes even if I set OFF , so the most safe way is to work with the point cloud only with all the same pitch point settings for best results .

1 Like

I had some time to scan another piece, a bookend.


2 Likes

I had some time to scan another piece, a bookend.


4 Likes

Very nice scan you got here !

1 Like

Well thank you very much but I owe quite a bit of my success to reading your contributions on this forum. :fist_right: :fist_left:

1 Like