Sharing My Experience with a Custom Magnetic 3D Scanning Marker Sheet
Recently, I created a custom magnetic 3D scanner tracking marker sheet, and the results have been excellent.
To make the marker sheet, I used:
- An A4-sized magnetic sheet as the base
- A 10mm hole punch , which matches the standard 10mm diameter of Revopoint scanning markers
all items was purchased from Temu, it’s reliable IF its not electronic devices
The key benefit of this setup is that it made post-processing significantly easier, especially when cleaning up tracking markers after scanning. The markers stay flat and stable on metallic or magnetic surfaces, helping the scanner maintain strong tracking throughout the process.
During scanning, the marker tracking performance was highly reliable, and the cleanup workflow was smoother and faster. I highly recommend this approach for anyone frequently scanning metallic objects or looking for a reusable and efficient marker solution.
Will post some photos of the magnetic marker sheet and scan results soon—stay tuned!
merge to Previous parts
***here is the different between the magnetic and the marker i used before
before:
after:
After switching to the DIY magnetic marker setup, I’ve experienced a significant improvement in both efficiency and workflow compared to the traditional method of placing marker blocks directly on the scanning surface.
Previously, even with the “Remove Markers” option enabled during post-processing, I still needed to manually clean up leftover marker geometry, which added complexity and time to the workflow. On average, this added at least 1 hour to the post-processing phase.
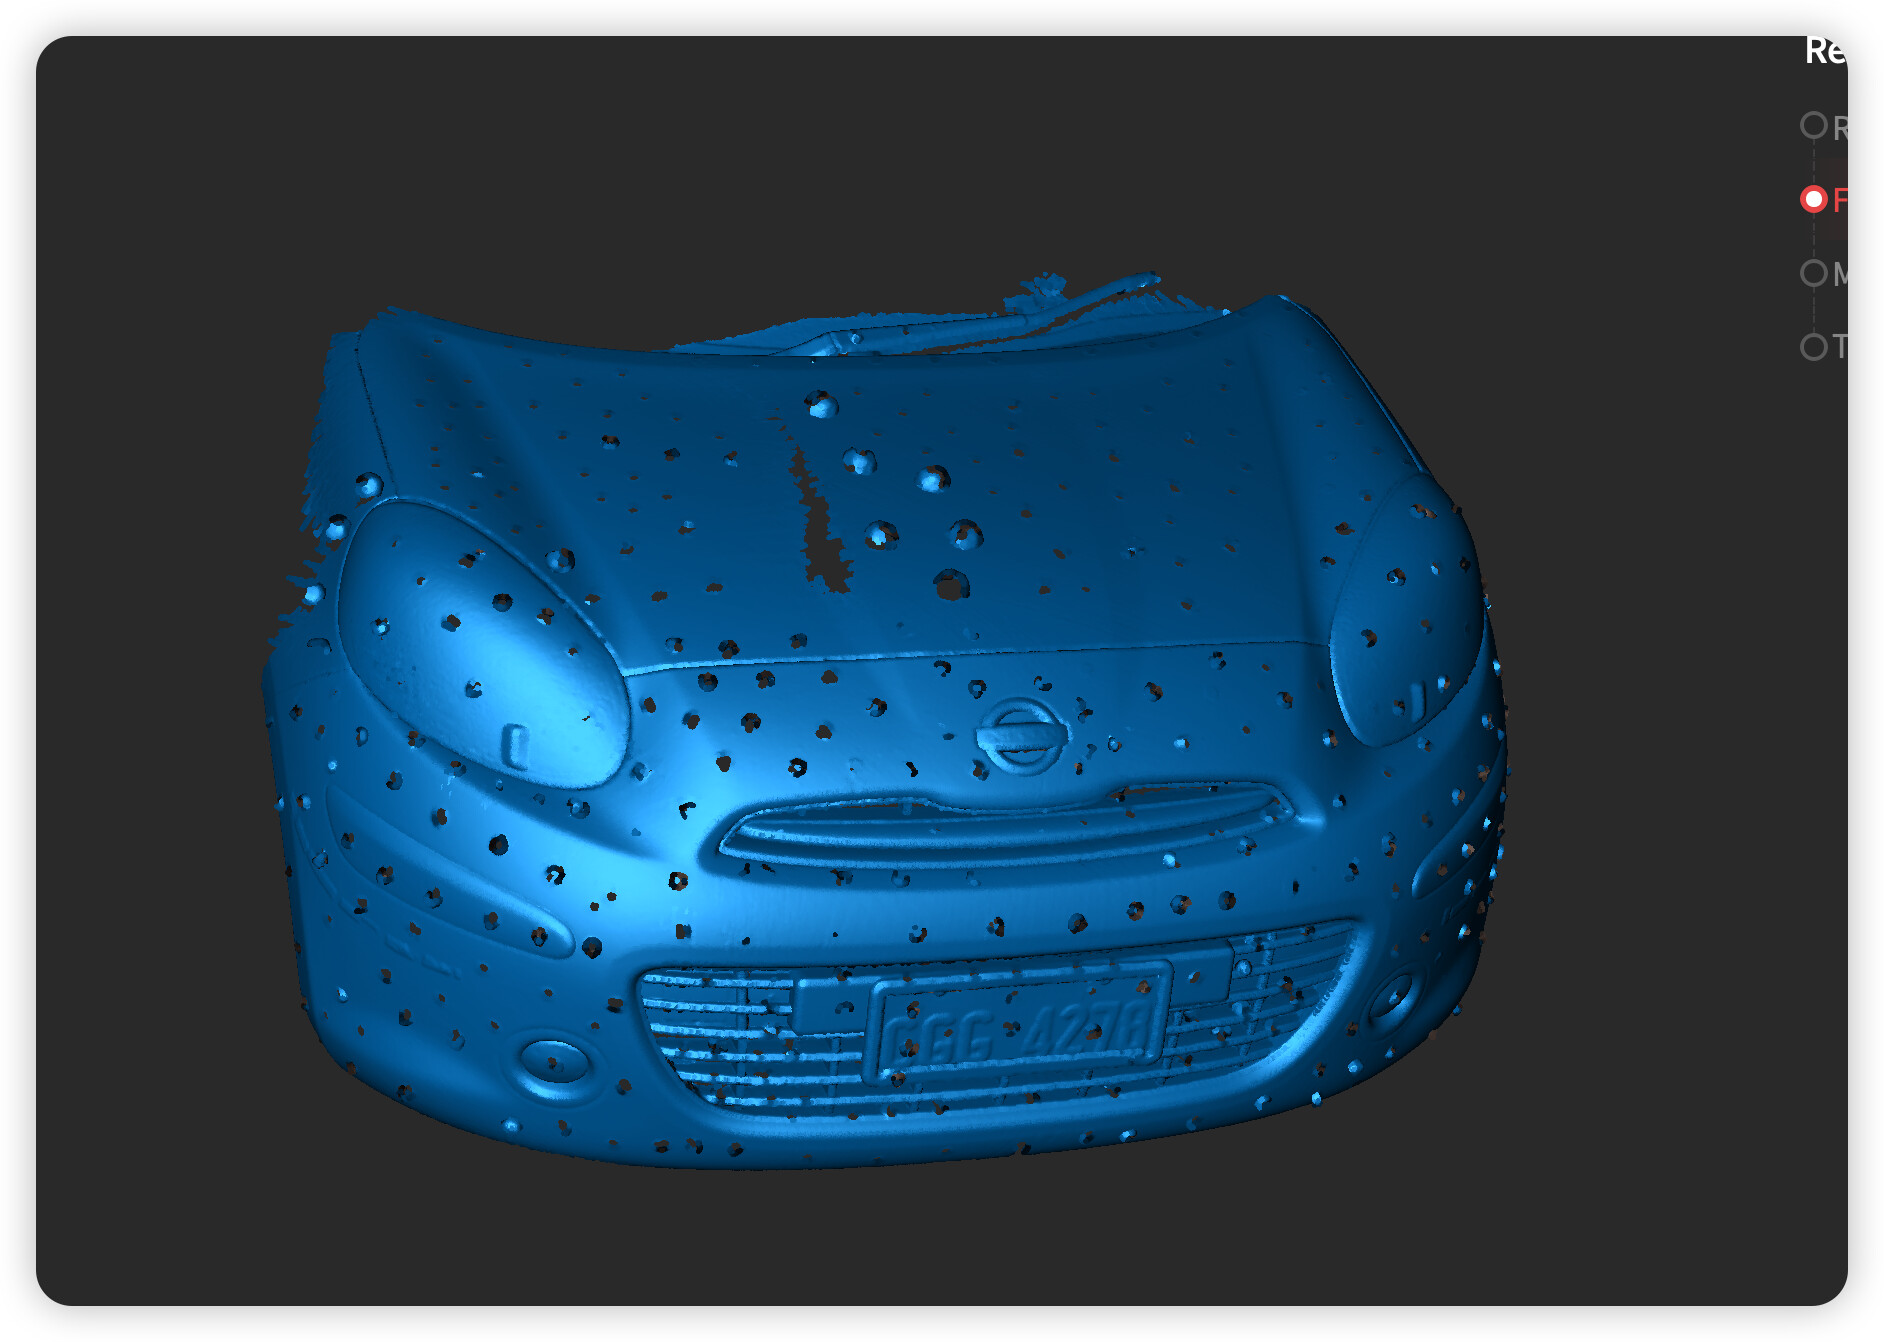
With the magnetic marker method, the workflow is greatly streamlined. After scanning, I proceed to the Fusion step, enable Remove Markers, and set the hole size to 10mm to match the punched markers. Then I continue with Mesh Generation (without fill hole), followed by manually filling the holes using the Curve option, depending on the scanned object’s geometry. This method eliminates the need for manual cleanup, saving considerable time.
An added benefit of this approach is that the DIY magnetic markers are reusable , making it both cost-effective and environmentally friendly over time.
magnetic scanning marker
I’ve recently created another type of 3D scanning marker using a semi-sphere design. The marker is placed on the flat side of the semi-sphere, while the rounded, transparent bottom rests on the scanning surface. This shape minimizes the contact area between the marker and the scanned object, which significantly reduces scan interference. Since the semi-sphere is made of transparent material, it’s unlikely to be picked up by the laser scanner, making it much easier to clean up during post-processing. This design not only improves scan quality but also simplifies the entire workflow.
new test scanning marker
***final setup