Hi All, Bone Lady finally back after a short respite from work, and ready to scan ~50+ horse neck bones for an upcoming publication. I had just gotten the new POP3 prior to taking a break so have not had time to really fool with it. Happily, just the couple of scans I’ve done thus far are quite promising. I just need some tips from all of you pros out there how to get a better scan.
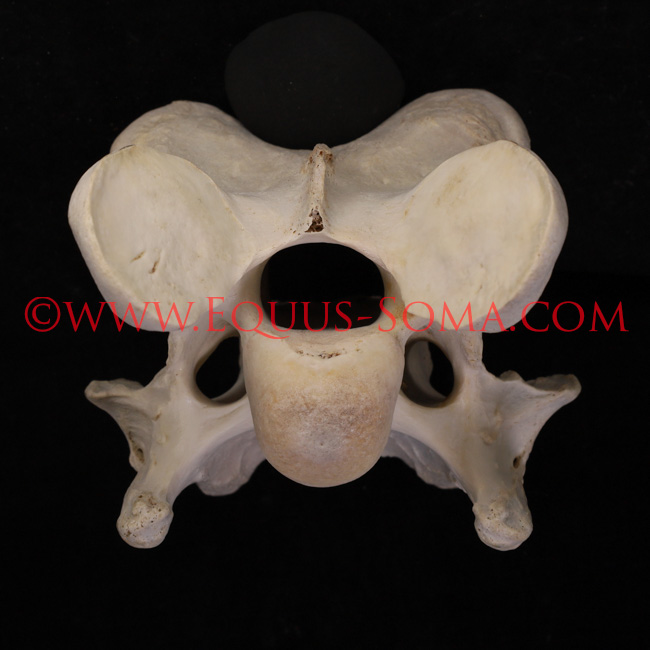
The challenge with these bones is capturing the detail inside the various canals (ex spinal canal). Here is a link to one of the bones that was scanned by a $30k Artec last year for me (I no longer have access to the Artec). Obviously, it was able to capture the deep details but this just shows you the places that are tricky. Dit C6 - 3D model by Equus-Soma [2a3a3b1] - Sketchfab.
Attached are 2 screen shots of a couple angles of the scan I just did (different bone). The arrows point to the areas that were missed. I use a turn-table and scan individual 360º scans several times, changing the angle and height of the POP3. Each revolution captures ~360 frames. I turn the bone over 2X. Total frames from this scan were 2603. I don’t want to keep repeating the same areas while I try to capture the nooks and crannies. Can I add a few short scans by hand-holding the POP3 over the canals? Any other suggestions?
Hi @BoneLady
Great job Pamela , not easy , it is all about the right angle , difficult areas produces shadows preventing the infrared to enter the areas .
If you want to keep textures , you need to keep pause the scans and change the angles , if you don’t need textures you can scan individual angles and merge them together by cutting off mist the areas that are captured already leaving around 20% overlapping.
Another thing you can do is convert the RGB color per vertex data into textures after merging so you still keep the color data but that would require some experiences with other 3D editing software like Zbrush, Blender or other …
Try to evaluate your bones to find the perfect angle entire , you can try it with simple mini flash light to see what angle produce less shadows … since each part is unique and complex you have to evaluate it each time as there are no shortcuts.
Hello PopUpTheVolume!
Thank you for the great advice. After I submitted this question, I went back to finish “processing” that scan to see what would happen when it was texturized and I was BLOWN AWAY at the result!!! It fixed all those missed areas.
I do need to use textures as I want the bones to look as realistic as possible.
I was planning to export these models into Blender and/or MeshLab for tweaking although I have limited experience using these programs and will have to take time to become more efficient. However, after seeing the result just by using RevoScan, I may not have to do that extra step, at least for the less complicated bones!
Thanks again for being so responsive and helpful, especially to us “newbies”. I’m going to incorporate you scanning suggestion and let everyone know how it worked for my bones.
Cheers!
Thank you, Johnathan! I must say I am very impressed with the scans I am getting thus far and the post-processing with Revo Scan 5. The trickier ones will still need tweaking in an outside program, but for the purposes of my research these will do just fine.