Midnight snack


Model Turntable

Sketchfab model
Amazing scans! specially the hand and foot!
Can you scan smaller objects? Ideally some coins ![]()
You cant scan coins with this scanner , the minimum volume size is 50 x 50 x50 mm 5 x 5 x 5 cm … For coins you need MINI and good practice …
You can see the ballbearing i scanned on top of the showcase it has better Precision than the announced for a object that is way off the minimum reccomended size.
the overall shape and dimensions are there and better than 0.2mm size tolerance but you cannot discern details like the text on the bearing, something you can with the mini.
I have a scanned 50 euro cent coin in my mini sketchfab collection
I like your scans. Can you tell me what settings you are setting? I can’t get good scans. Lots of noise on the scans.
Probably better to start a new thread and post some examples of your setup and issues so me and the others in the forum can help you.
post things like your scan setup photo your scan result and the scanner you are using
Tag me with @X3msnake so i get notified of your post and can reply.
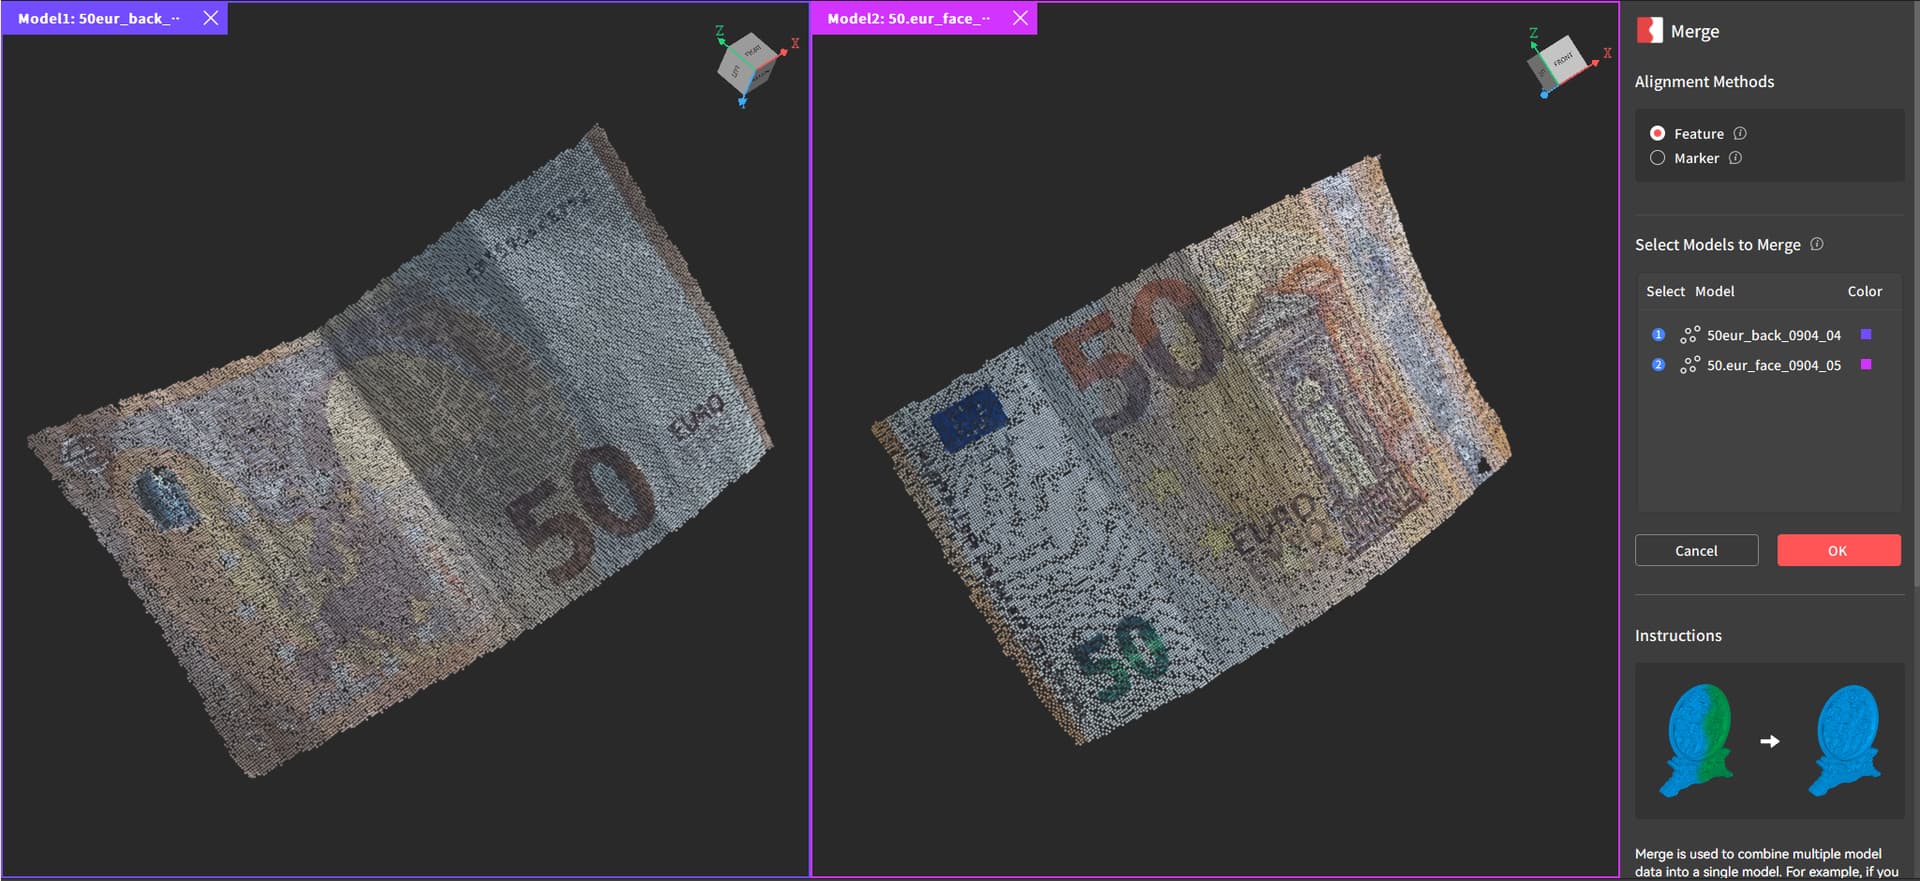
Note: The main reason why merge was done in Cloudcompare and saved as FXB was to merge the textured models since Revoscan cannot merge textured meshes yet.
Legal requirements for currency digitalization and sharing https://eur-lex.europa.eu/legal-content/EN/TXT/PDF/?uri=CELEX:02013D0010-20210104

The SSR is there to modulate some weight ![]()
Beautiful textures ! Well done
Nice scanning work! Thank-you for sharing. Your post may have inspired my to purchase the Inspire.
I’m interested in your scanning technique for the foot as the Inspire may a provide a useful workflow for orthotics. How close can you have the Inspire scanner to your foot when scanning (for my application, closer is better)? Are there any special concerns when scanning the foot - such as lighting? Does the Inspire lose tracking easily while scanning the foot? Did you use any reference points (dots/markers)? How many individual scans did you use to create a fused scan?
Any info you can provide for scanning feet with the Inspire will be appreciated as that is what I am considering using it for. Thanks!
Single scan all in one go, i can use my Revoscan Frame Player and extract and post the scan footage here alongside with the scan depth capture tommorrow so you can have a idea of the movements/tracking i did to scan.
No powder, no prep, it was a selfie (scanned my own foot posed as in the photo)
scanner can scan as close as 180mm but on my foot selfie i used 250 as minimum and 340 as maximum cutoff
If you do decide to buy use my link ![]()
#Learn more about INSPIRE
Thank-you, this is very helpful. I actually have David Laser scanner setup which is very accurate and scalable - so not new to scanning. However, it is not practical for live subjects the way newer portable scanners are.
That would be great if you can post the scan footage from the Revoscan Frame Player. I forgot to ask approximately how long a foot scan takes, but the footage will probably reveal that.
Yes, happy to use your link to purchase ![]()
We received a fugly wreck of part to build a replacement for a client, here is a quick overview of the scan part (using INSPIRE) for our rebuild process (uncut video)


If anyone want to replicate the pattern of my manual turntable check my post


Thanks for posting the videos! Nice work. Now I understand - one scan with several pauses/restarts with probably around a minute or two of scanning and pausing. This fits well into my planned work flow.
What you gonna do with it ? ![]()
If i had printed them miself i would be using them to design custom insoles.
But as these are printed by a friend that is living in the US working in the medical area, probably he will be using them as reference