We’re looking for passionate 3D scanning professionals and enthusiasts to test our new INSPIRE 2, MetroY, and MetroY Pro 3D Scanners. Whether you’re involved in reverse engineering, historical preservation, medical modeling, or simply innovating in your field, join our program!
How to Join:
Share your best scan on social media/Revopoint official forum + #MyRevoProject and tag us
OR
Fill out the form for entry
* By sharing your scan = you’re cool with us featuring your work
Sharing & Winning:
Best scans → Hands-on experience with either INSPIRE 2, MetroY, or MetroY Pro
All participants also have a chance to win: Dual-axis turntable + 500 Markers Scanning spray × 2 + 500 Markers Marker packs (10 standout scans)
The scan was carried out with the goal of obtaining an accurate 3D model of a digital multimeter for reverse engineering applications. Thanks to the POP 3 Plus combined with the dual-axis turntable, it was possible to precisely capture complex geometries and fine details. The use of the VL49 LED light improved illumination and reduced shadows, resulting in a clean mesh optimized for subsequent CAD modeling.
@Revopoint I’m a professional archaeologist in the UK and undertook a project with my Revopoint Range (original model) yesterday. Here is a late medieval (late 1400s to early 1500s) bench end within a church in the UK.
I used the Range tethered to my trusty Mac laptop. It is 772mm high and 320mm wide, made of very dark polished oak. I used an LED floodlight to provide indirect illumination. The Range isn’t ideal on many complex carvings due to the deep cavities, but I was asked to demonstrate how the scanner worked by interested parishioners, and so I scanned this bench end whilst they watched. I scanned at High Accuracy, and fused at 0.3mm (Advanced). The results are fantastic. You can even see the light chisel marks/tooling from when it was carved more than 500 years ago. The churchwarden has long believed the cloth to be a snake, but now believes it to be a representation of Jesus’ robe (Psalm 22:18). The Revopoint Range helped to make a little discovery.
The images show (left to right) the meshed point cloud in Revoscan (oblique), a slightly rotated version to show the sub-mm tooling, and a version made in Blender using Ambient Occlusion to enhance details.
The Range might not be the latest but it’s still a very capable scanner.
Thank you for uploading your project , very nice results !
From my knowledge ( studied classical art ) the scarf is called “ Majesty” from Biblical meaning : Representing the Majesty of the Lord . Together with the staff representing the Kingdom ( House) of the Lord .
The reason why until today the Royals wearing ribbon across their chest. In medieval times Chief soldiers also wear a “Majesty” scarf over the chest or waist for the same reason as it was very symbolic.
That why definitely it is a Majesty scarf and not a snake.
Reverse Engineering Project: electrifying a Piaggio Ape
Scanning setup used:
Revopoint MIRACO Plus
Revopoint MetroX
A crashed Piaggio Ape is rebuild to be power by two electric motors. To mount the motors in the place of the old diesel engine a new motor mount is needed. With the help of Revopoint Miraco Plus the chassis and all mounting positions was scanned. MetroX is used for smaller details and extra external parts like the cooling reservoir.
The new motor mount is modeled with Fusion and the help of FEA. 3D Printed and manufactured in 1.4404 stainless steel it fits perfectly into the mounting spot thanks to the exact scandata.
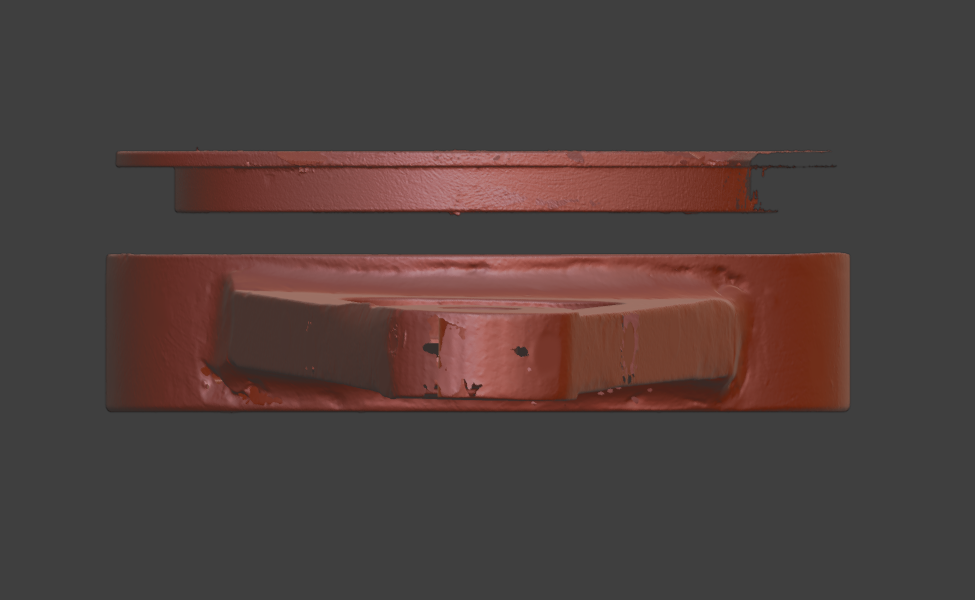
Currently I am helping an aircraft repair plant. The task is to create 3D models of broken or old repair equipment. After the creation of 3D models, the question of their production will be decided. There are many more tasks, but I will solve them as they come. I want to share the result of working with one special tool. I use a 3D scanner MetroX
I made many different 3D scans using magnetic markers. After combining all the point clouds, it was possible to create an assembly from the scans of this tool. I have placed all the scans in an assembly for a visual demonstration.
Below there will be screenshots of this assembly with some statistics:
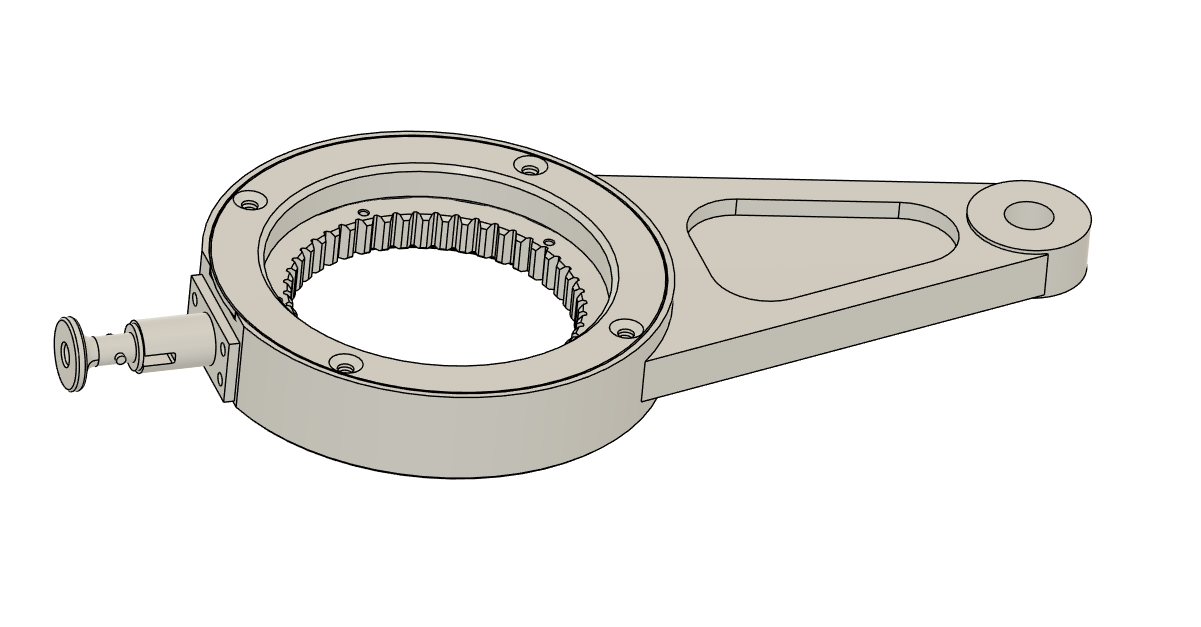
After reversing the scan data, i was able to create a solid CAD model. We will continue to refine this model. As a result, there will be test production.
I teach students how to create 3D models from 3D scans.
In this case, I have scanned my DJI NEO drone and will use the scans to create a 3D model using Rhino 3D.
You can see that the drone is quite small with a lot of detail. I sprayed the drone with AESUB scanning spray to highlight the black Camera Gimbal and Props.
I mounted the drone vertically on a small Revopoint Folding Turntable and completed the scan in one continuous scan using my MIRACO PLUS 3D scanner.
I am very happy with the level of detail that the scanner picked up.The picks below are raw scans without any cleaning up.
The black box with green lights under the Revopoint Turntable is a battery pack. It has a couple of USB outlets for powering the turntable, lights etc and recharging the MIRACO if needed. It also has 240V mains out to run my Large Revopoint Turntable.