Hello, as we all know the way RevoScan textures scans isn’t the best so let me introduce you to a method of getting textures of almost photogrammetry-scan quality!
First make sure you have the following software:
Blender: Download — blender.org
Meshlab: MeshLab
Cloudcompare: CloudCompare - Open Source project
And also a phone or a camera - we’ll need it to take some photos of our object. I’ll be using a phone with a tripod and remote shutter to make the capturing process quicker.

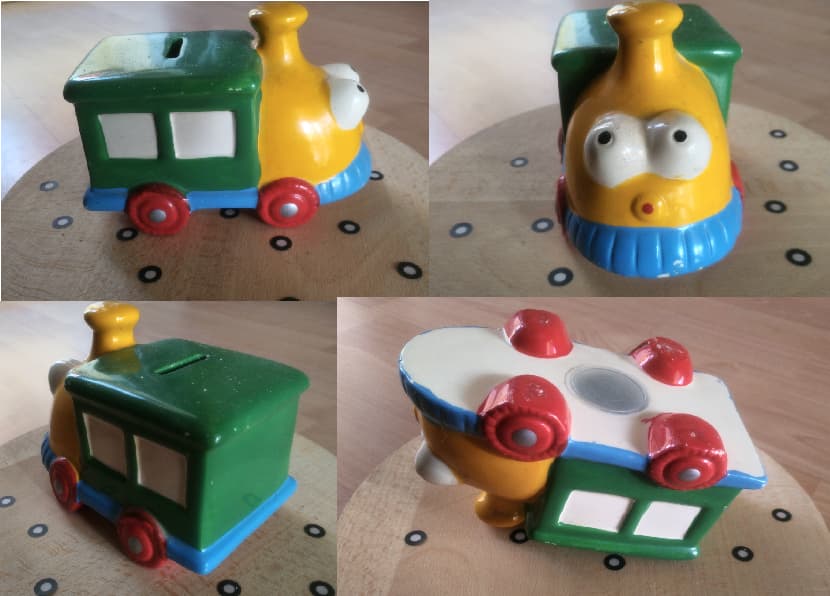
For demonstration purposes I’ll be scanning a train piggy bank, it’s a bit shiny so the texture won’t come out perfect but thankfully it’s all in dust so scanning it shouldn’t be a problem!

I’ll begin with a photo-session first, for that I’m using a manual turntable in a well lit area (if you have a backdrop make sure to use it instead as having no background will help against ghosting artifacts).
I’d recommend you to take a photo every 30 degress, you don’t have to do an all-around capture if you didn’t scan the bottom though (or the object is flat).
Here are some of my photos:
Now that we have the photos transfer them to your working PC and let’s do the scanning. For this object I did two passes (top and bottom) with the following settings: Feature, High accuracy and most importantly Color (this will help a lot later ![]() ).
).

I exported these scans as .ply files and imported them into Cloud Compare - here we’ll be doing the post processing.

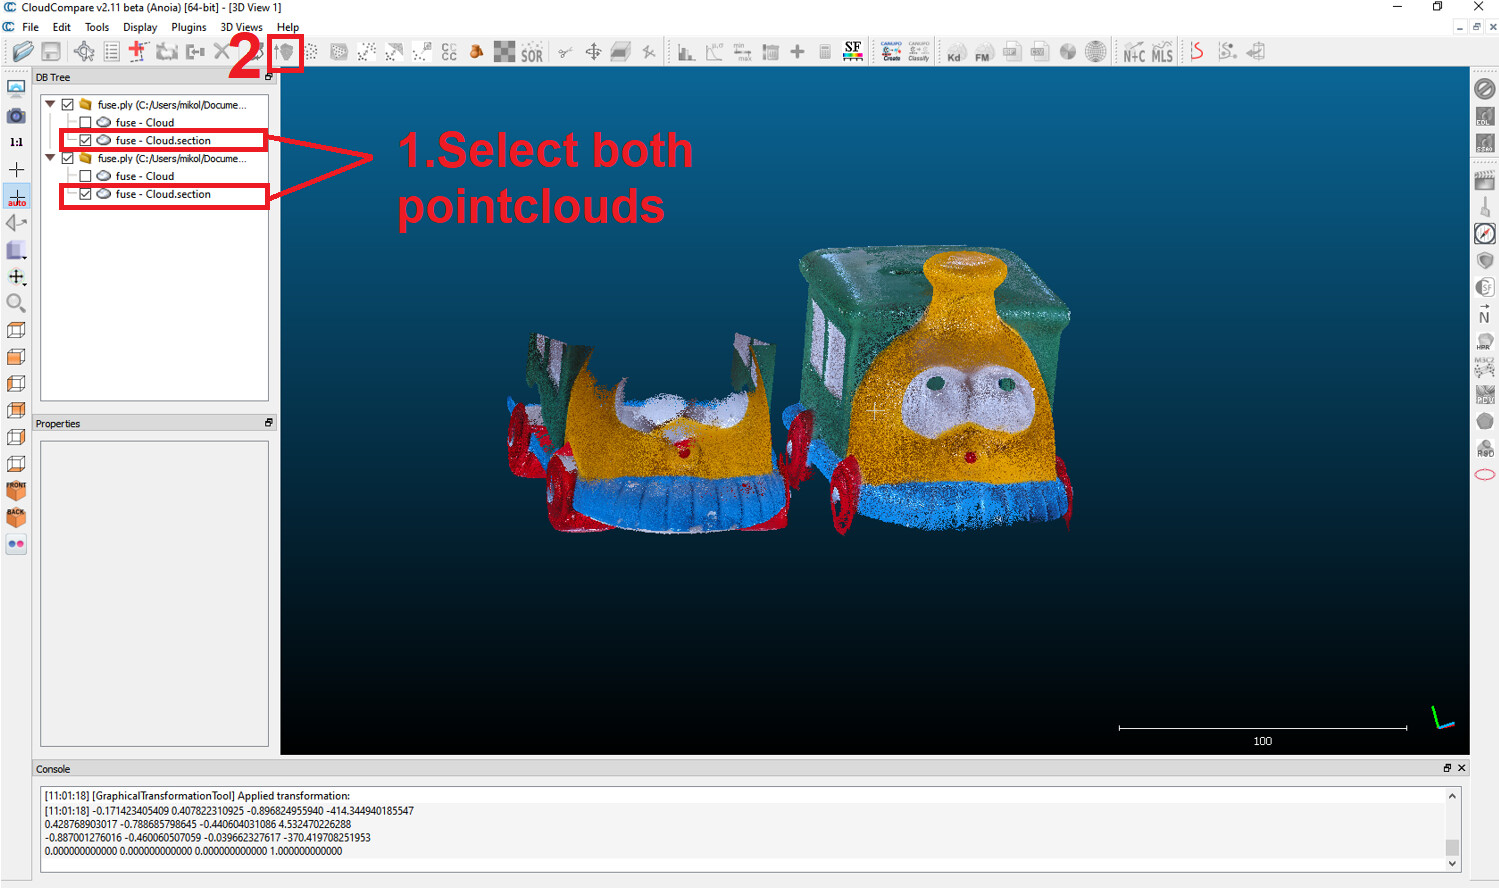
First thing I did was removing the turntable from both scans, for this I used the cross section tool in CC. With the various gizmos I cropped the bounding box to remove the turnable and then extracted the new pointcloud. (What to click in the below screenshot)

Next I cleaned both pointclouds with SOR filter (check out @PUTV 's tutorial on cleaning the pointclouds) and now it’s time for the alignment!
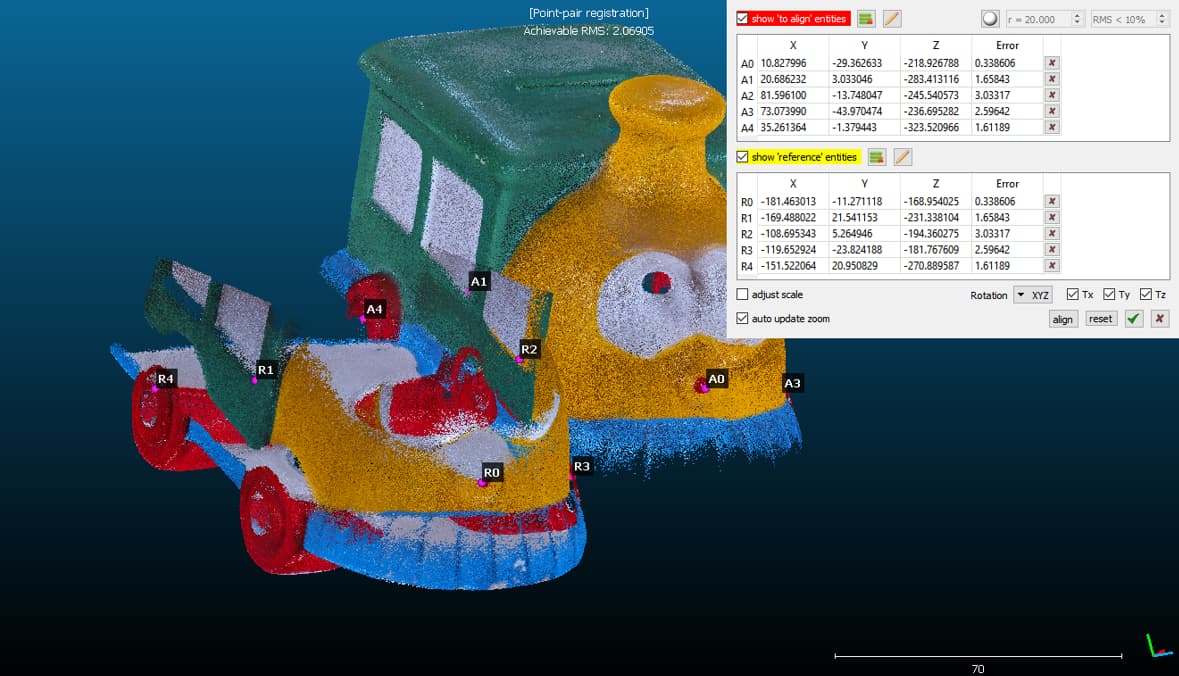
Make sure to select two pointclouds and then click the marked button, a popup will appear asking you which scan to set as the base for aligning (if you’re aligning more than two scans make sure to remember it). Now we’ll be moved to the stage where we select markers, to add them double click on a first scan’s spot that’s also visible on the other one and then place the second marker there.
Repeat the process until you get at least 4 matching points (more is usually better but if it gets messy remove the ones with the biggest error factor).
With that done you may notice the pointcloud is off in some places, to fix that we’ll perform fine registration (that button is set to the right of the aligning button).
Select all your scans and in the popup make sure to check adjust scale, change overlap to 30-50% (depends on the scans), and in research tab change random sampling limit to more than 200.000 so that the calculations are more accurate (and don’t take too long) - confirm these settings and wait. (I’d also recommend cloning your scans as it’s not always successful and there’s no reverse button)

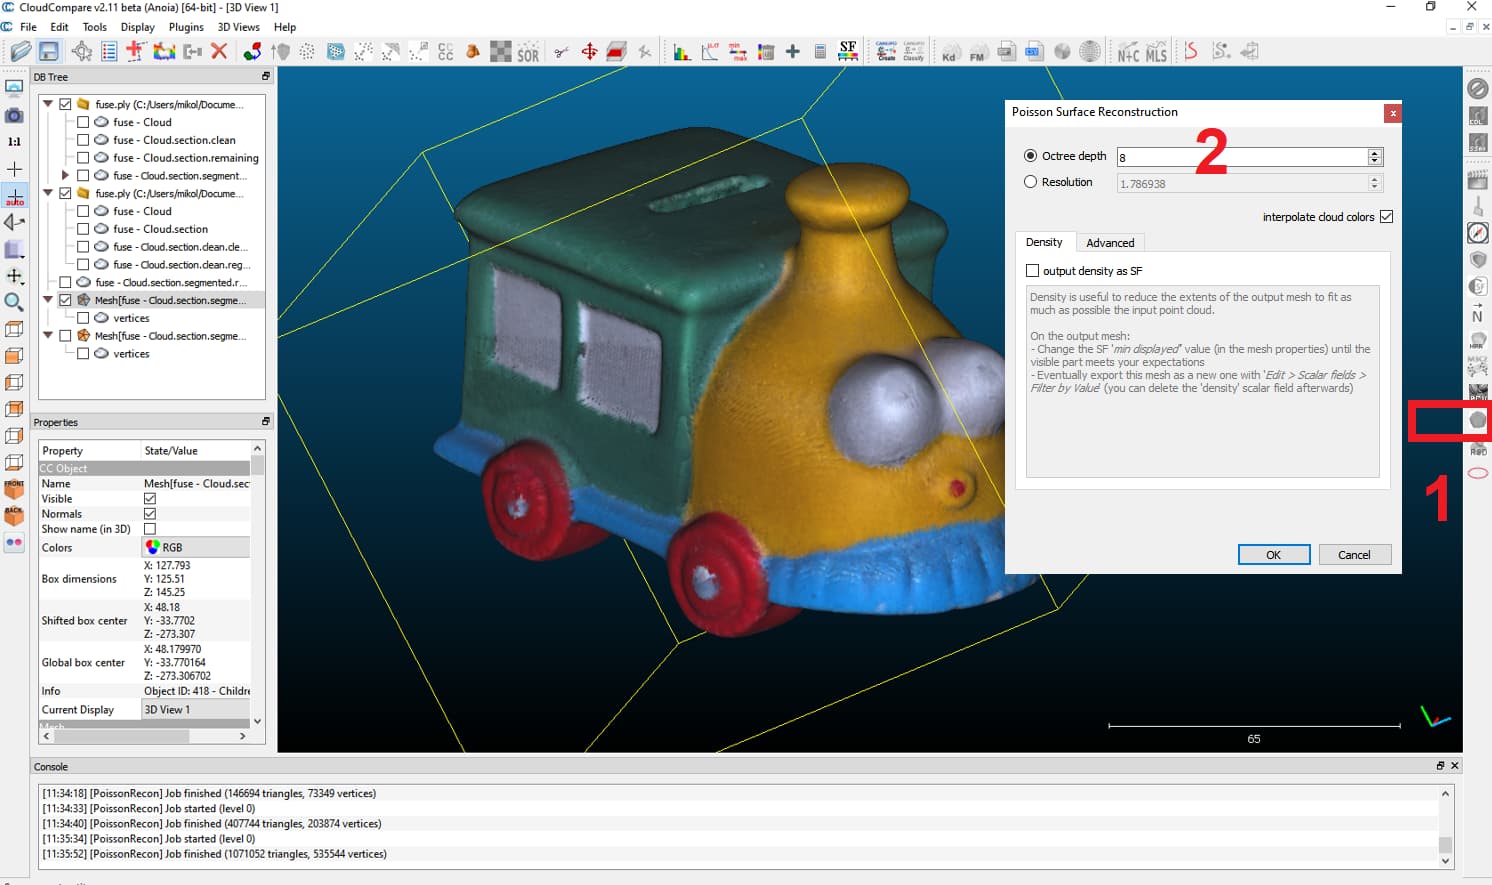
The last step in CC is to mesh it with poisson reconstruction tool, octree level 8 or 9 should do the job.
Export the mesh as .ply to retain vertex colors and import it into Meshlab. Here we’ll be aligning the photos we’ve captured before to our scan, so import the photos by selecting “Import Raster” option.

With all the stuff imported click the following buttons so that we can begin, next roughly translate the model into the photo’s position - to do that you can use:
hold RMB - rotate
shift + hold RMB - scale
hold scroll wheel - move
And finally click “Apply Mutual Information Registration”.
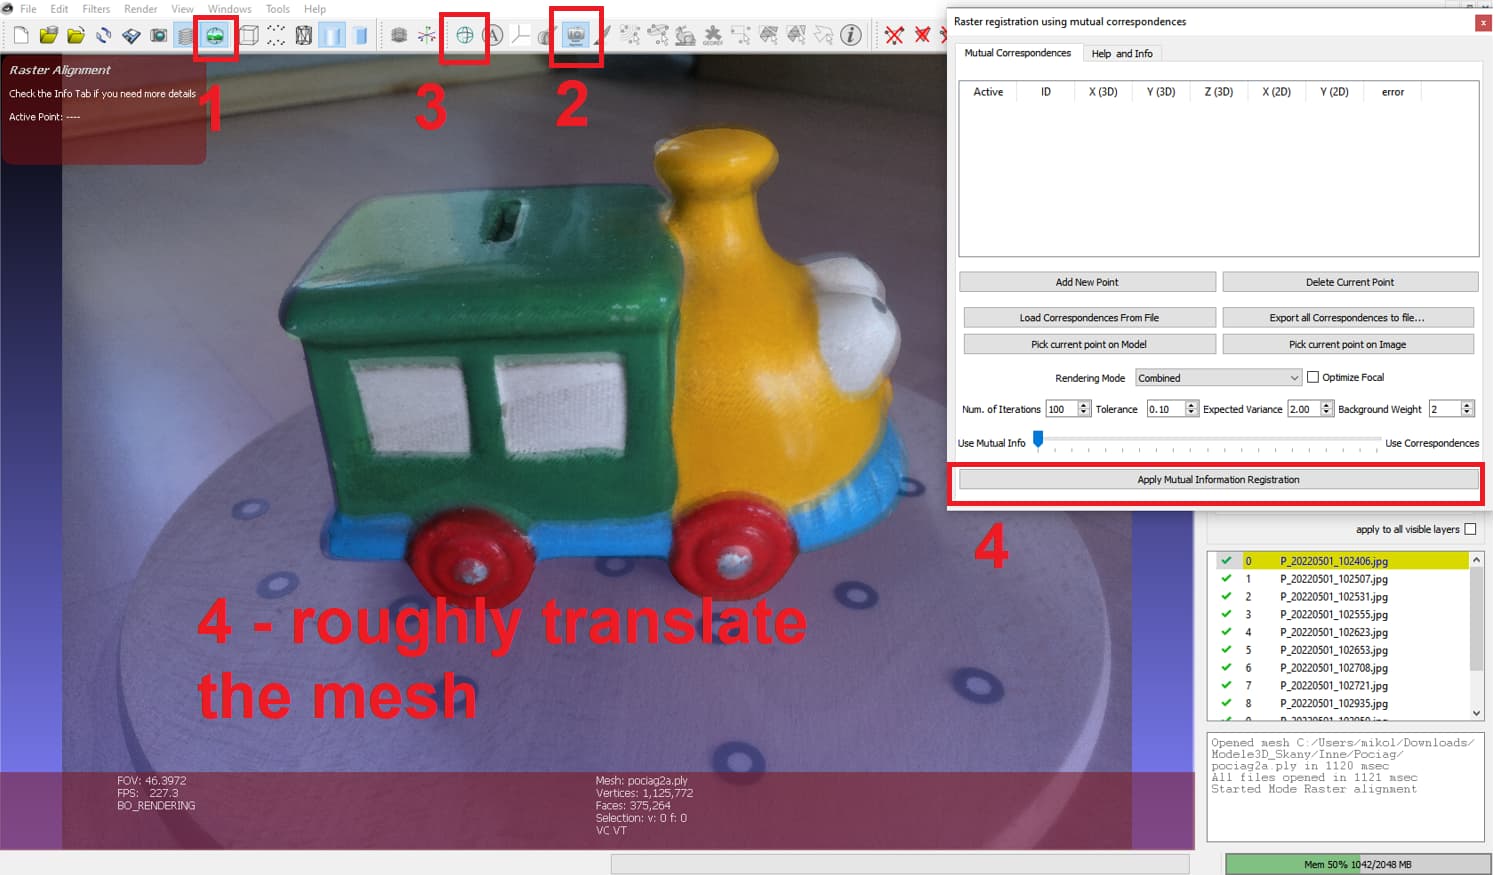
If your scan got aligned correctly you can click onto the next raster, if not then we’ll have to add special markers - this is where the vertex colored mesh becomes helpful. This process may also be quite tricky so I’d recommend you to watch this video to understand it better: Meshlab features: Raster Alignment Tool - YouTube

Hopefully that didn’t take too long! Now for the last step let’s export our model once more as .ply and open it up in Blender (if it’s too big decimate it with quadratic decimation filter [and if it’s broken somehow use the poisson reconstruction filter] and export the result).
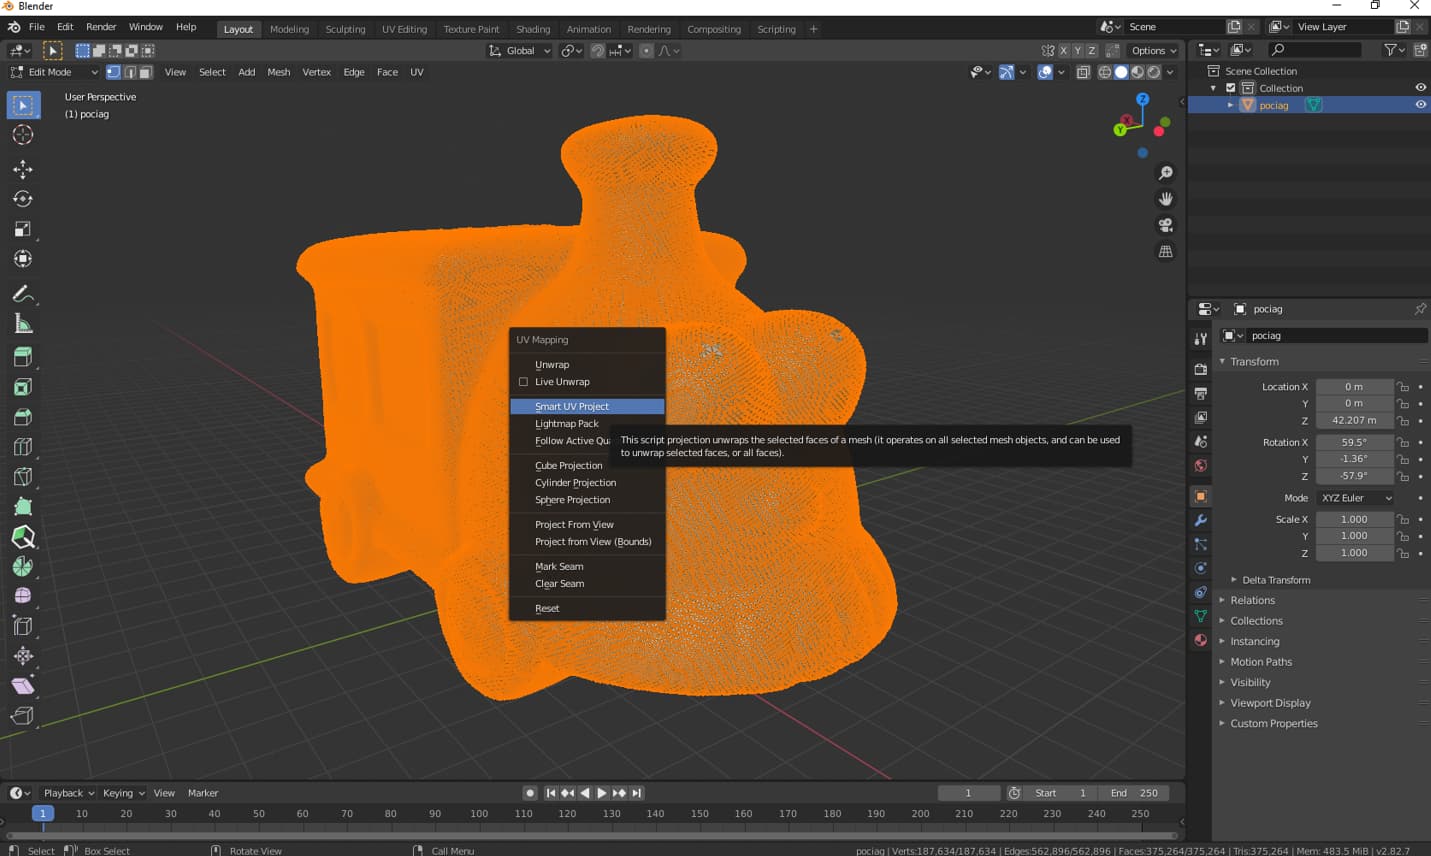
In Blender press A to select everything and Del to remove selected objects, now import the new file. After import press TAB to go into editing mode, A to select all vertices, U to open up uv mapping menu and select Smart UV Project (this process may take a while so be patient).
Sometimes Meshlab has problems with reading the UV map of a mesh if it doesn’t have an assigned texture so let’s do just that.
Go into UV Editing tab and click the buttons shown in the below screenshot - we’re creating a texture file so name it whatever you want and don’t forget to save it next (step 2)!

After it’s done assign the newly created texture in Shading tab, just drag the black texture into the node box and connect it with Base Color. Lastly go back to Layout tab, exit edit mode with TAB, select your mesh by clicking on it and export it as an .obj file, now reimport it back to Meshlab.

Our new mesh may appear as black but it doesn’t matter, select it and open Filters->Camera->Project Active Rasters … And Fill Texture.
A popup will appear where you have to choose the name for your new texture and its size (2048 and 4096 are good resolutions) - now just click Apply and the texture should be computed shortly!

This is my result:
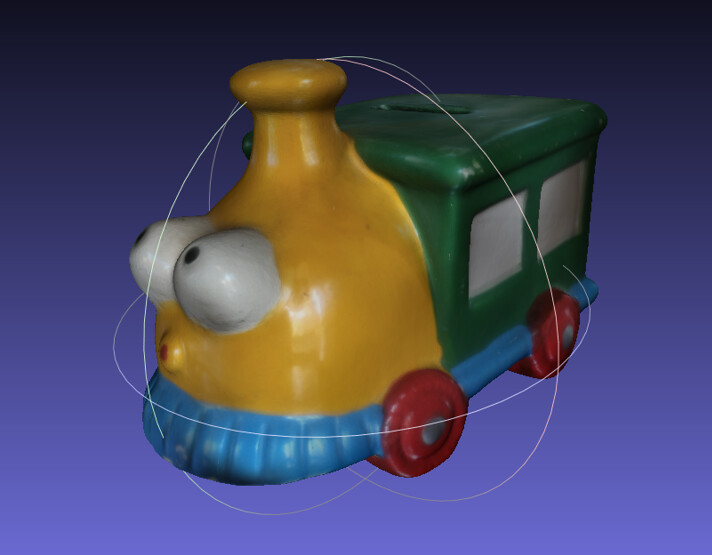
See it on Sketchfab: Train Piggy Bank - Textured Revopoint POP2 Scan - Download Free 3D model by Sircher (@Sircher) [f5e6639] - Sketchfab