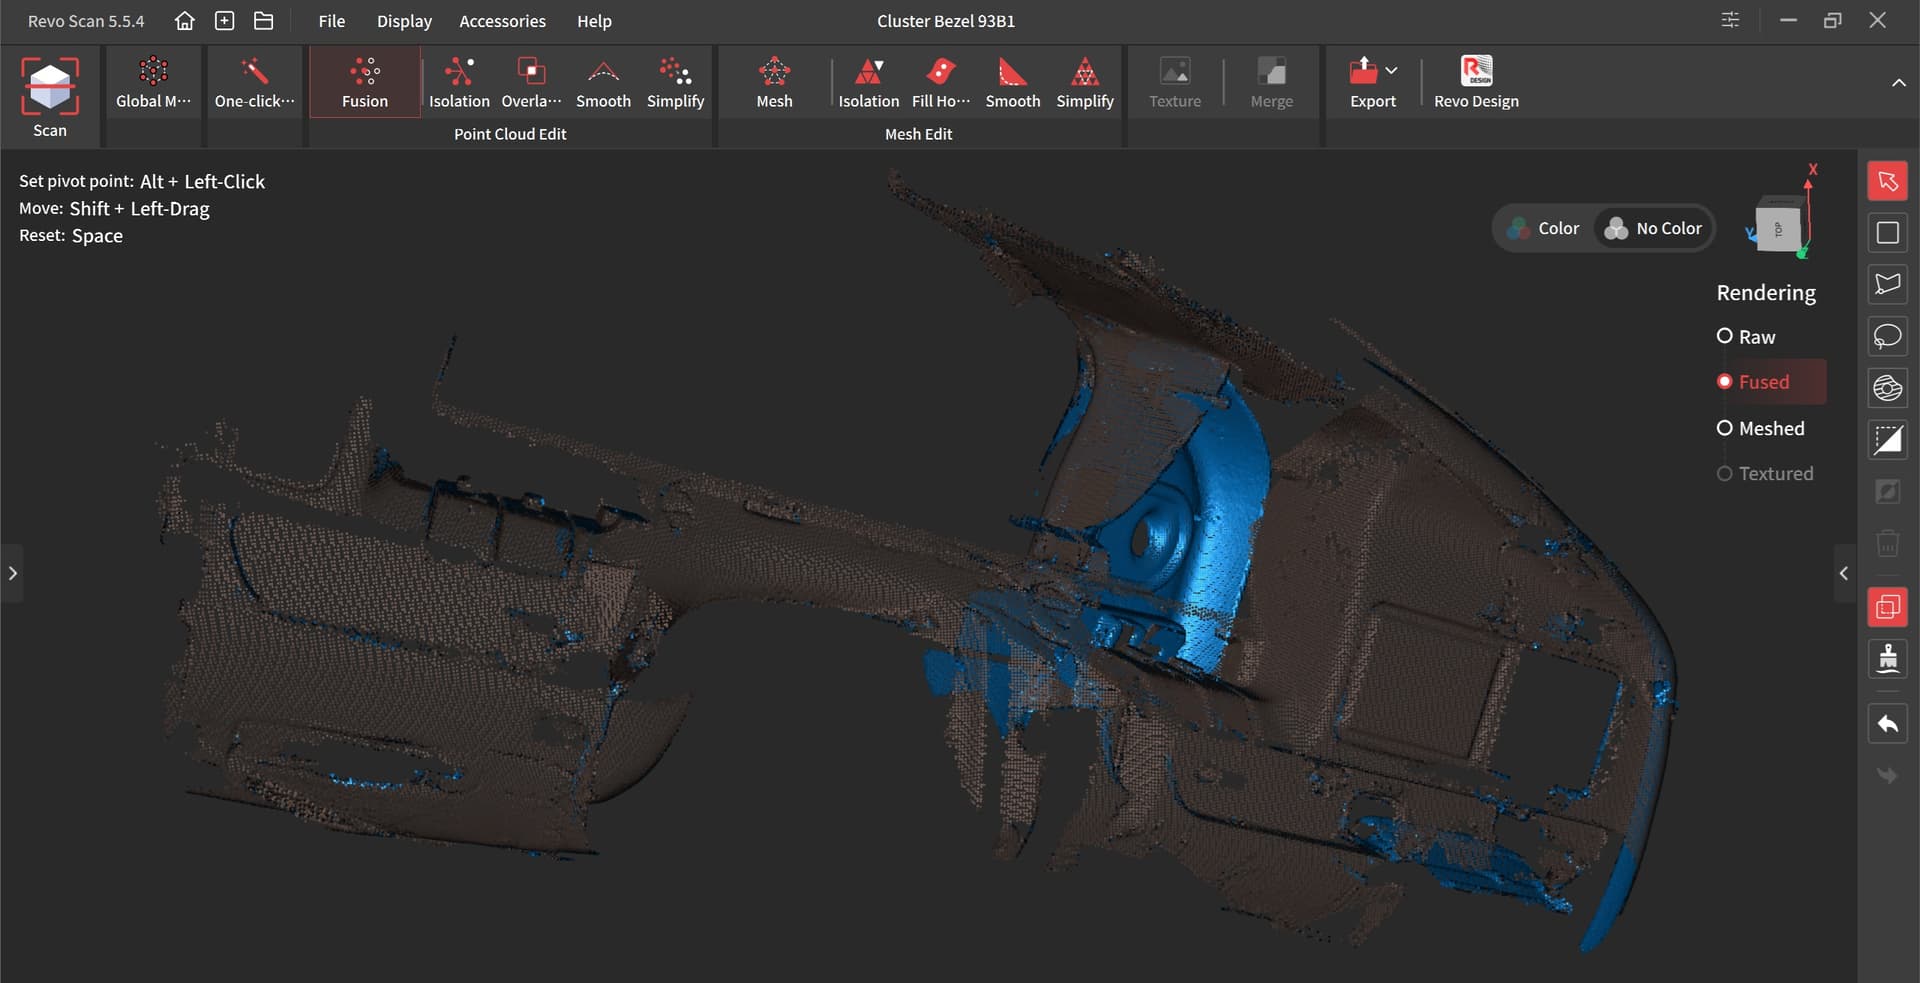
I’m just learning to use my new Miraco Plus, mainly on antique auto parts for some reverse-engineering, and some modelling of new parts. In my recent scan, which was done in single-frame mode, moving slowly around & across an instrument cluster bezel, the tracking on the screen looked decent through the whole process.
But when I started looking at the point cloud, I could see that it had folded back on itself while moving across the top, causing the left side upper to face the right side. I thought I could somehow separate them & re-merge them manually, but I can’t find it in RevoScan5 on my Win11Pro desktop.
Is it possible, or do I have to start the scan over from the beginning?
I have not messed with the miraco so take this just as my opinion (every one has one)
but I would do a second scan of the area that messed up with lots of overlap to the previous area scanned, cut the folded area out of your existing scan and then merge the two scans.
Like I said this is just my opinion and there are plenty of people on here that know way more than me me
@wazza77 hace a good point and I would suggest the same , by removing the frames under RAW frame edit option before fusing , then you can merge them together after fusing and cleaning .
When doing single frame scan, the best option to have minimal 36 frames for each rotation angle with a good 20% overlap.
Thanks to both of you, and that sounds like what I’ll do. @PUTV I wasn’t using a turntable, which now that you mention rotations, is probably why I got the fold. I was holding the scanner moving it around, and I moved the part a LOT, too. I haven’t attempted to edit the point cloud by frames yet, so I’ll have to look into that. IDK if you could tell, but the first 2 images above are after some lasso cleanup.
But just academically; is it possible to cut out the bad area/frames, save it as a project/mesh/cloud/whatever - then go back to raw & cut out the good frames, save that, then merge the 2? Maybe one save on the scanner & one on the computer? Thanks again.
Make a backup of the project before you edit the frames as it’s a destructive process. So if you want 2 pieces of the same scan you’ll have to have 2 copies of it.
Technically deleting frames is more like hiding them, but there’s no way to unhide them from within the Revo Scan interface (which baffles me to this day). But deleting points in the frames is permanent.
TheBoatScans
Make a backup of the project before you edit the frames…
I’ve been playing with it, and I re-scanned the folded side, but I don’t see how to edit the cloud or frames before fusion. The manual doesn’t seem to describe that; only 1-click, or fusion as the first step. While looking at the cloud, there are no editing tools available, and I can’t see the raw scan as a file on the Miraco or through the PC. I only see projects that have gone through some processing.
Do you mean editing individual frames? I haven’t seen that, either. If you mean within a fused cloud project; I’d have sworn that I lasso-deleted a bunch of trash from a fused cloud project in that folded scan, then went back to try to re-fuse it without that noise, and they had all come back. Maybe I’m mis-remembering.
You removed points from a fused point and go back to fuse again expecting it to…?
No, I didn’t know what to expect. I’m fumbling around right now trying to learn how to do things. I’ve only had the scanner a week, and this is only my ~4th attempt at scanning anything. I haven’t mastered the scanner; I haven’t mastered the editing process; I haven’t mastered using the scan results; and I don’t know the right process to get something useful. I’ve watched a lot of “tutorial” videos, and read a lot (but not all) of the manual, but they all focus on what to do when everything goes right. Very few even mention problems - much less how to solve each possible scenario.
You need to edit frames or all frames in RAW mode…
I’d love to. But I don’t see any editing tools on the screen before fusing or 1-click-editing. Nor do I see the raw cloud as a file that I can copy to my computer. I only see projects that have been fused/processed. This what I see after tapping the check mark on the capture screen: this raw screen without editing tools.
Yes you can only use Frame Edit Mode on the PC (and Mac) version. The Miraco projects are just normal projects. When you connect the Miraco to your computer and put it in data mode you can copy projects directly to your PC using an Explorer window instead of the Revoscan import. I don’t use the Revoscan import so maybe that behaves differently. After you copy them they should look just like any other project.
Since you already used the computer version of Revo Scan
You will find it under the scans in the left side of the software .
MIRACO software don’t have that option as it is only available in Revo Scan .
Check the list of your scans on the left side and click the 3 dots next to the name , the menu will be visible and you can select RAW edit .
After that you will be moved into RAW edit tab where you can select all the frames and cut off the elements you don’t want .
Since you mentioned early that the scan flipped, try to select individual frames that corresponding with the area you want to remove , one selected click delete
After you are done you will have an option to save your changes before moving to Fuse Tab
If you are new to it , please practice on some scan that is not important , just to get familiar with this tool , because removing frames is not undoable.
After you copy them they should look just like any other project.
Thanks. I’m not really familiar with “any other project” because I’ve only had the scanner a few weeks, and this is maybe the 5th thing I’ve scanned, and maybe the 2nd I’ve tried to work with. I’m also trying to learn AutoDesk Fusion (formerly Fusion360) at the same time…
So when I’ve finished a scan, and I press the check mark to move into the screenshot above (that has One-tap Edit as the first option), how do I get it to save that raw data (does it have to be saved before fusing?) to then transfer it to the PC in a raw state? Or do you mean that I can fuse it, save it then, import to the PC, open the project in RevoScan5, and then still have access to the raw frames despite it having been fused on the Miraco?
…select individual frames that corresponding with the area you want to remove , one selected click delete
After you are done you will have an option to save your changes…
Can I save those changes as a new file/project/whatever, then go back to the original un-edited raw scan on the PC and work on it again?
If not; can I save the edits, close that project on the PC, rename it, then re-import the un-edited version from the scanner and treat them as 2 scans that could be merged? I realize that it might be easier to just re-scan the frames that I delete, and I probably will. I’d just like to know what’s possible.
The changes will overwrite your original project and you can’t recover it after .
You need to duplicate the project first with a different name then working on the new project only if you want to preserve the original one . Not other way around
I wish there was an option to duplicate the project inside the software .
I would not recommend you edit or merge the scans on MIRACO if you editing stuff on your PC , PC giving you a better quality and more tools for that .
I just scan raw stuff and import it to PC for editing , easy this way and better control over resolution and quality in general .
After you imported your project to PC , just go to the Home tab , right click and go to the project location , copy it and paste , it will create duplicate project with an (1) at the end so you know both projects belongs together , then open the duplicate project and work on the raw edit … if anything get wrong , you still have the original , only the RAW frame edit don’t have undo option after saving , all other edits after Fusing can be reversed back to begining .
Don’t use the One-tab-Edit it will not give you best quality . After you edited Rae frames , click Fuse tab , it will ask you to Save it before processing , then click yes …and you will move on to Fuse option , after fusing you can edit your scan with the tools from the right side of the software , also please clean the scan from lose points and overlapped points before merge or meshing .
Under meshing choice the same GRID settings that you used with fusion , for example you fused at 0.10 mm , use the meshing quality GRID at 0.10 mm for best results .
Having higher settings will induce artificial points that can create noises and artifacts. Using too low settings will result in lost of accuracy and details.
Don’t fuse or edit your projects on MIRACO if you going to work and edit it on PC .
If you create a new project on the PC, it will ask you where to store it. The default for this path is in the settings and you’ll probably want to change it from the default. Once you open a project on the PC and it shows up on the home menu, you can press the … button and select “open folder” to open an explorer window at your project location. You want to copy the whole directory of a project (the home menu thing will open up inside of the root folder you want to copy) when duplicating/backing it up. You can open your duplicates like any other project so that you can do some needlessly destructive editing (I say needlessly because the software should be better at this and I’m sort of snarky about it because it never changes).
Unless you want to delve into how to manipulate the project files manually, you’ll be duplicating project folders and editing within those projects, exporting point clouds and importing them into other projects. It’s not fun. There are a few forum members who have examples of Python code for doing some QoL things that Revoscan really should do (like splitting and combining projects, unhiding “deleted” frames, etc).
The scans I do that aren’t for amusement are usually in locations that I can’t return to easily or at all, so I’ve learned the hard way things I can do in order to salvage scans that I can’t redo.