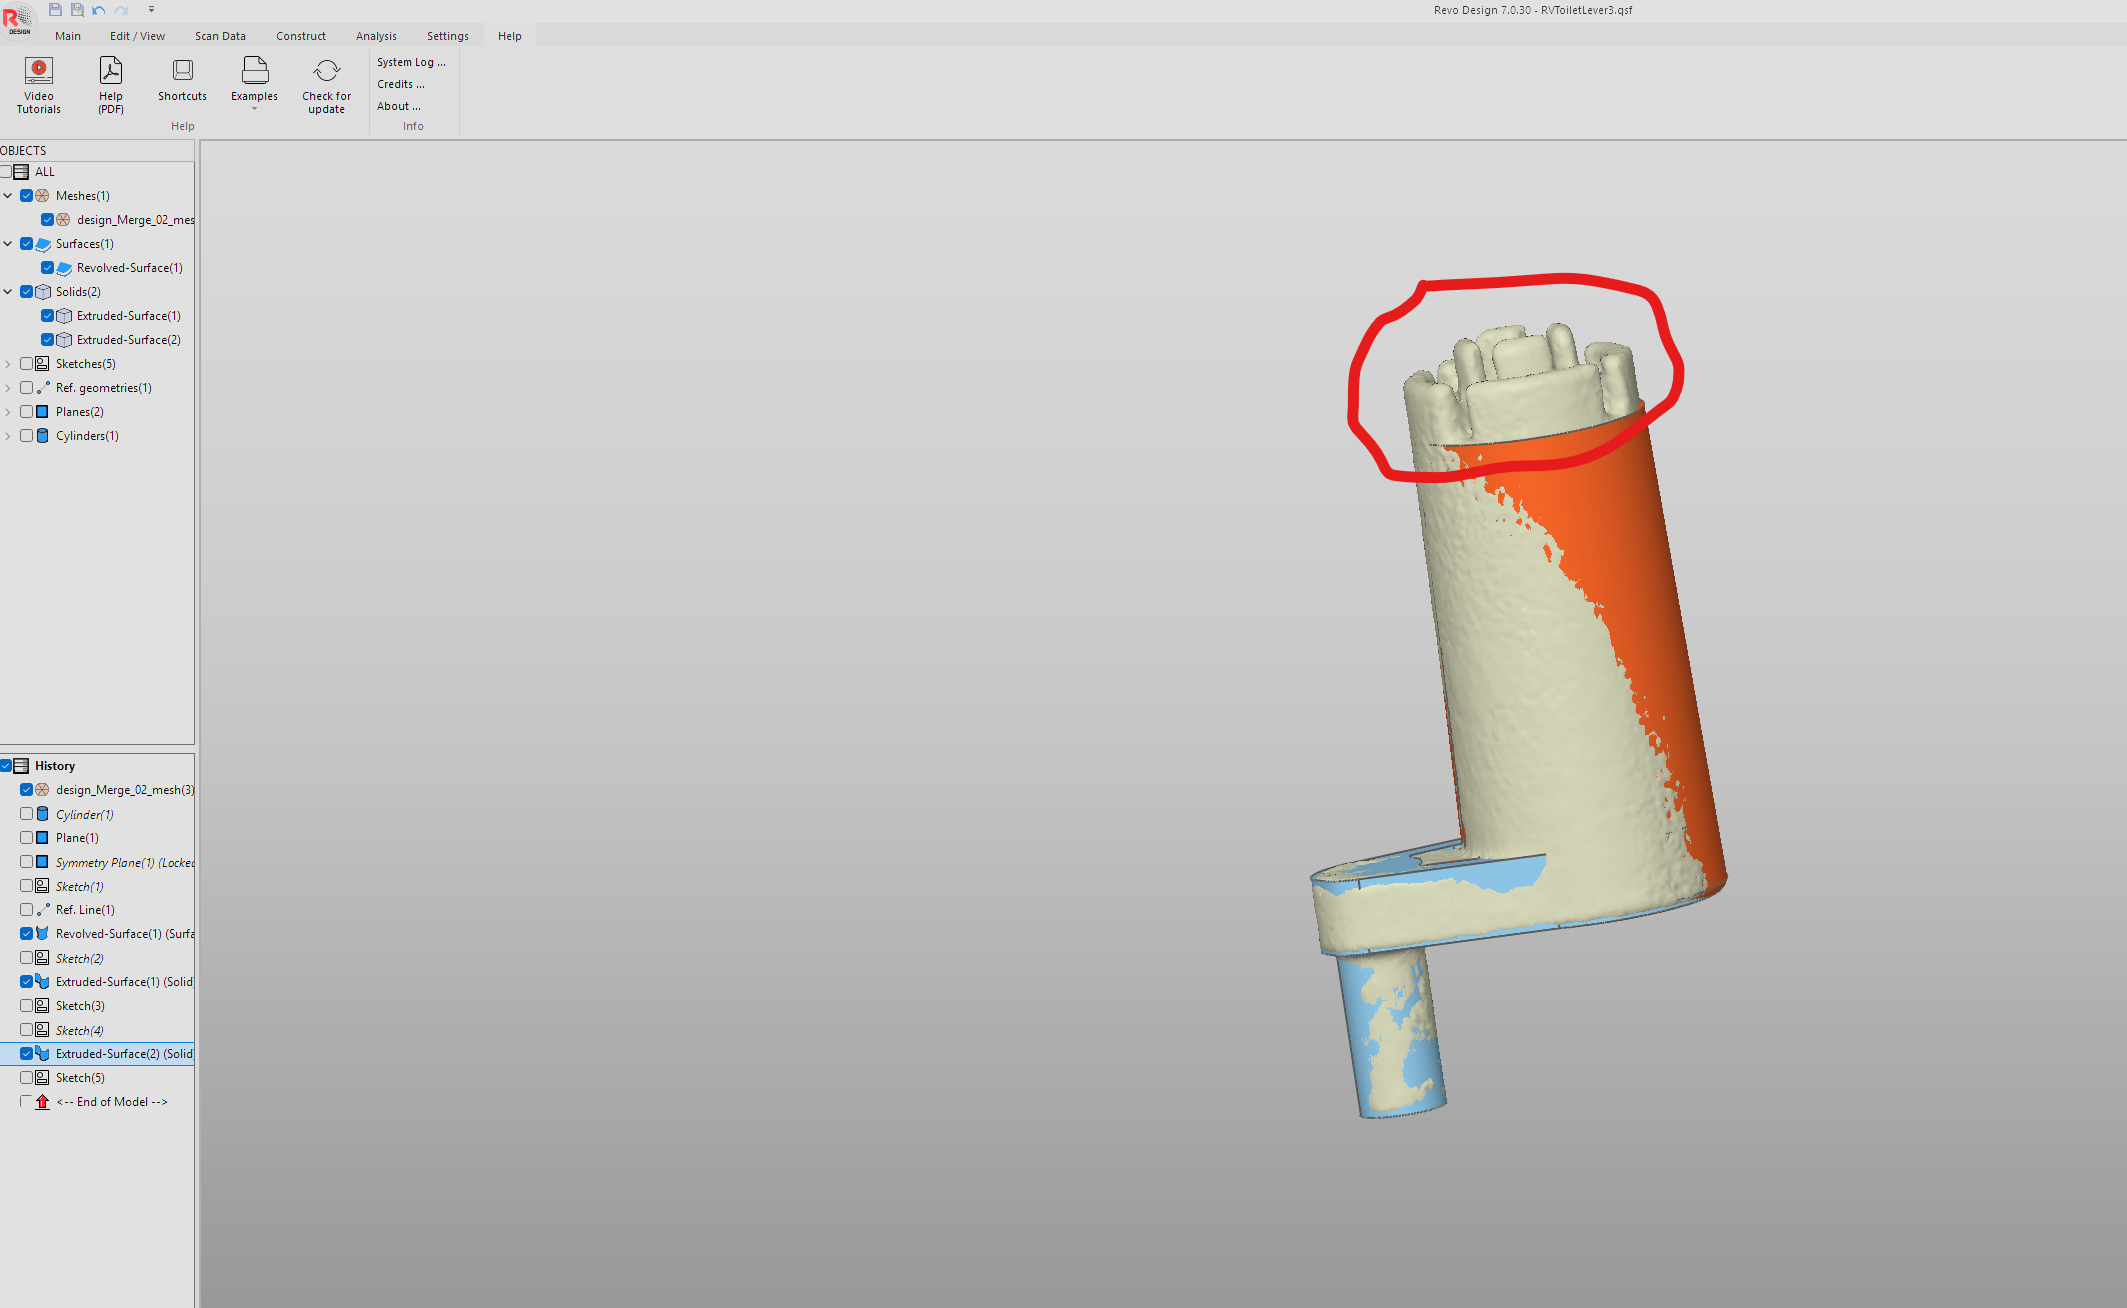
I am having issues using revodesign to reverse engineer the attached track it scan. I am able to get the simple geometry down. However, the complex top part is what I am having issues with. Does anyone have any recommendations on how to accomplish getting the top piece reverse engineered? It also seems like it could be easier with pro features that aren’t available in the revodesign portion. Any help would be appreciated!


The non pro version lacks a lot of features in my opinion. I found it not very usueful besides orienting scans. Many would tell you a pair of calipers would be better for this part. But you got to start somewhere. There are a few good threads on here of RE workflow so try searching for those to get some ideas.
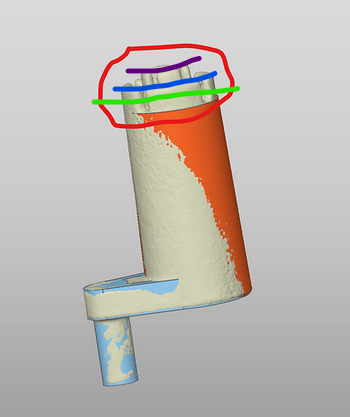
I would make a plane that intersects about where the green line is below. This should give you a cross section with all those features. Extrude them down to your orange solid, and then extrude the outer ones up to the blue line and the rest up to the purple.
Hi! Here’s the step-by-step guide to help you complete the reverse engineering of the complex top section using Revo Design with data scanned by Trackit.
Please refer to the operation guide for detailed video instructions for each step below.
Step 1: Extract Cross-Sections (Refer to 3. Get started - Lesson 3 & 24. Mesh section)
Use the “Cross-section” Tool
Create multiple horizontal cross-sections through the complex top area (recommended: 3–5 layers).
Set spacing between sections based on detail level (e.g., 2–3 mm).
Capture all relevant contours, including small pillars or stepped features.
Save Each Sketch
Save each section as an individual sketch (e.g., Top_Section_1, Top_Section_2, etc.).
Step 2: Build Surfaces or Solids
Option A: Use Loft Surface for Irregular Platform (Refer to 53. Loft)
Go to the “Loft Surface” tool.
Select your saved sketches in order from bottom to top.
Choose transition type (Smooth or Sharp) depending on curvature needs.
Confirm to generate a smooth surface over the top region.
Option B: Use Extrude for Pillars (4. Use Extruded Surface)
Create new sketches on appropriate planes for each pillar (circle/rectangle).
Use “Extrude” to pull them upward into solid shapes.
Repeat for all small structures, then combine later.
Step 3: Combine All Parts (Refer to 72. Split mesh)
Use “Boolean Union” to merge your newly created surfaces/solids with the main body model.
Check seams and transitions—use Fillet or Chamfer tools if needed for smoother edges.
Step 4 (Optional): Fix Mesh Issues Before Modeling
If your original scan has holes or noise:
You can clean it up first in Revo Scan, then re-import into Revo Design;
Or manually patch missing areas using Loft or Surface Patch tools inside Revo Design.